Easy Sourdough: A Beginner’s Guide
Homemade sourdough is easier than you think. Just four ingredients and simple step-by-step instructions for a crusty, flavorful easy sourdough bread recipe you can bake at home.
Easy Sourdough
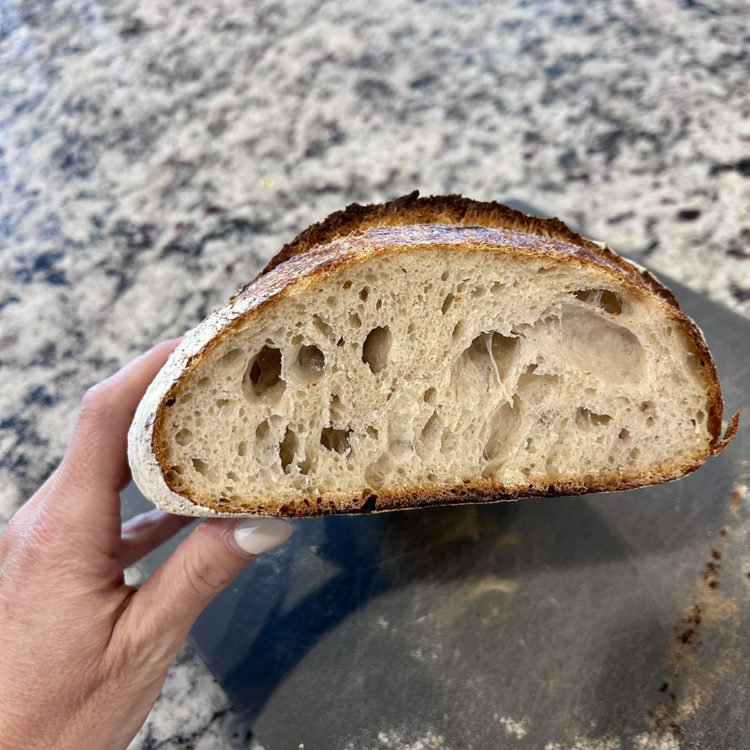
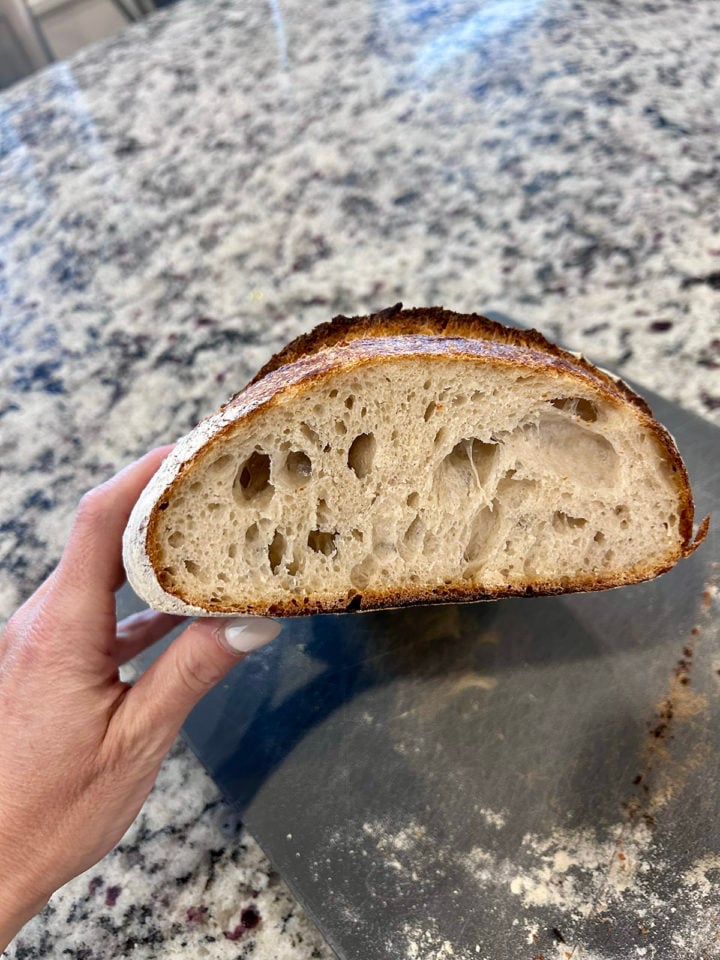
Like a lot of people in 2020, I tried my hand at sourdough. Instead of buying a starter that just needed to be rehydrated, I decided to make one from scratch. It worked. Sort of. The loaves, though? Dense, flat, and not very tasty. By the time I got something close to a real sourdough loaf, summer heat hit and I gave up.
Recently I gave it another try, this time starting with a dried store-bought starter. That shortcut just skips the growing-from-scratch stage. Once it’s active, you care for it the same way. And this time? Total success.
Making your own starter does give you more hands-on understanding of sourdough, but for me, the real goal was bread that tasted amazing. Now I’m baking up crusty, flavorful loaves with ease, and I can’t believe I quit before.
This post is the beginner’s guide I wish I’d had:
✔ The tools you actually need.
✔ What each ingredient does.
✔ How to keep your starter happy.
✔ And a step-by-step recipe for your first easy sourdough loaf.
Happy Baking!
-Katie
Tools You Actually Need
To make sourdough, you don’t need a bakery setup, just a few basics:
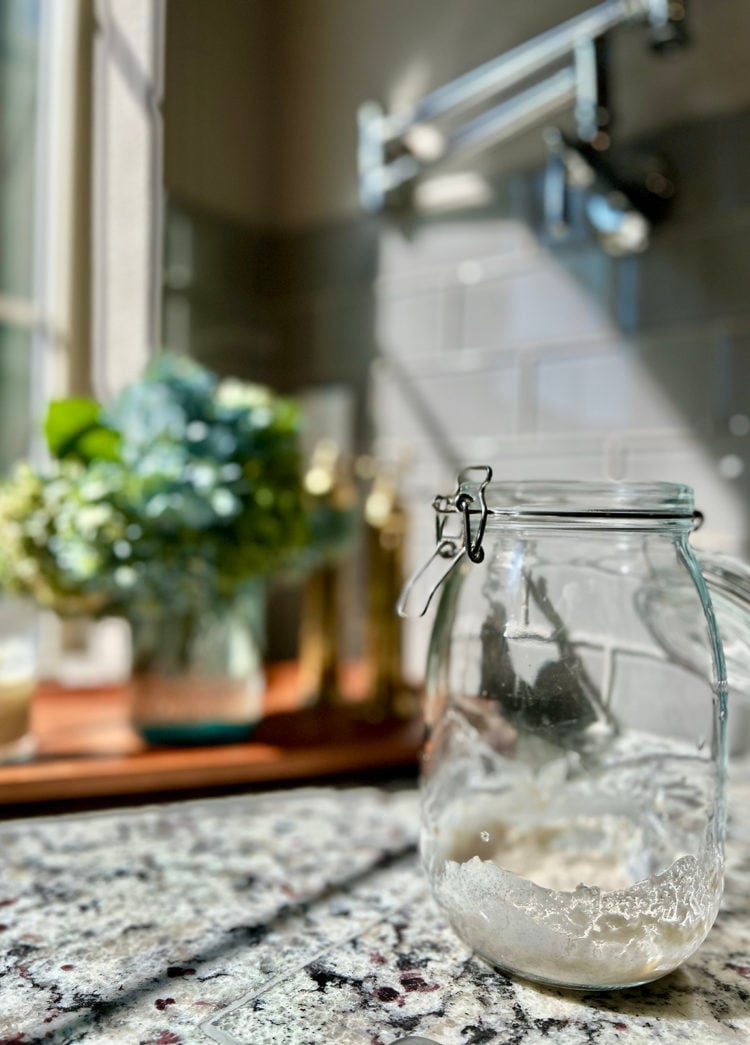
- Jar: for your sourdough starter. A clear glass jar helps you see bubbles and growth.
- Spatula: for mixing and scraping the starter. A long, thin spatula works best for getting into the jar.
- Large bowl: roomy enough for mixing and folds.
- Digital kitchen scale: the one non-negotiable tool. Weight is everything in bread baking. You’ll be weighing everything in grams when you make sourdough bread.
- Dutch oven (or heavy lidded pot): this is what makes bakery-style bread possible at home. It traps steam so your loaf rises tall and bakes with that gorgeous, crackly crust.
Nice-to-have extras:
- Proofing basket: helps the dough keep its shape. Or just line a bowl with a linen tea towel.
- Bench scraper: keeps sticky dough under control.
- Danish dough whisk: stirs dough more easily than a spoon or spatula, especially at the shaggy-mix stage.
- Cast iron bread oven: totally not necessary, but a fun wishlist item if you fall in love with baking sourdough. I’m adding this to my Christmas list.
So What’s in Easy Sourdough Bread?
- Flour: Bread flour has more protein and produces a dough that is easier to work with for beginners.
- Water: Filtered water is best because chlorine and other chemicals in tap water can weaken your starter. Warmer water speeds fermentation, cooler water slows it down.
- Salt: Strengthens the gluten, balances flavor, and slows down fermentation just enough to keep everything in check.
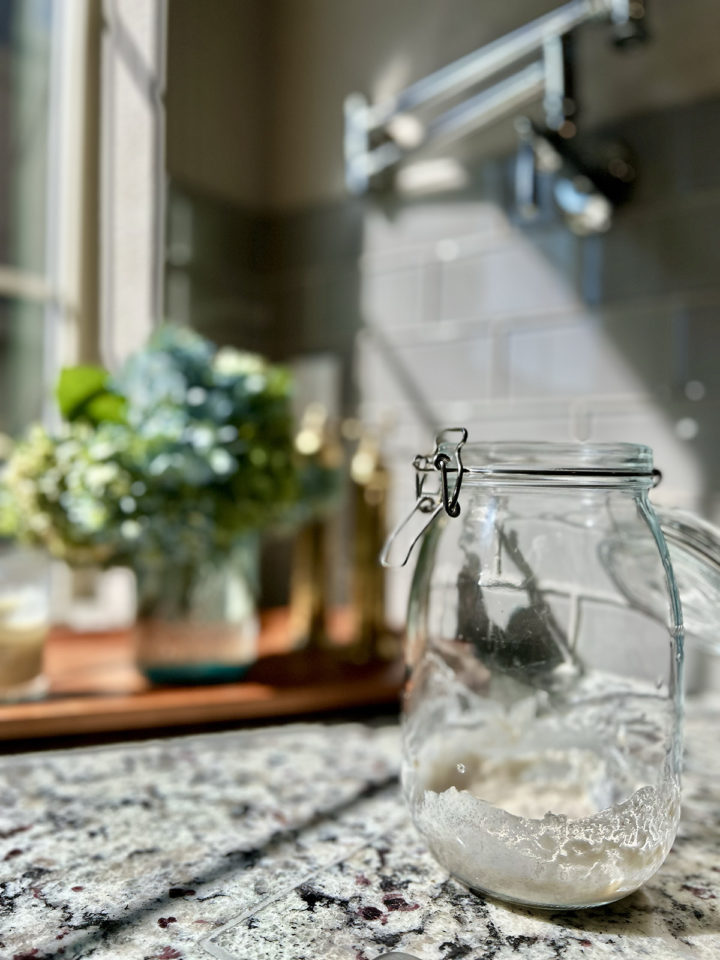
- Starter: Instead of using a dried yeast, starter contains a mix of wild yeast and bacteria to make the dough rise and give it flavor. You can grow your own using just flour and water. Or you can buy one dried and rehydrate it. Once it’s active, you care for it the same way.
Katie’s Tip: If you’re local, I’m happy to share some of my starter with you! Just send me a message on Instagram.
Maintaining Your Starter
How often you feed depends on how often you bake. If baking daily at room temp, feed once or twice a day depending on how warm your kitchen is. If baking every few days, let it get bubbly, then refrigerate; before baking again, take it out and give it one or two room-temperature feedings. If baking less often, keep it in the fridge and feed weekly.
At room temperature (70–75°F), the starter is typically ready to use within 4–8 hours of feeding. In the refrigerator, fermentation slows way down. So, if you’re not baking regularly, store it there and feed it once a week.
Katie’s Tip: Coordinate your feeding schedule so that your starter is at its peak activity (bubbly, doubled, domed) precisely when you plan to mix your dough.
You’ll know your starter is ready for another feeding when it has doubled in size, the top is still slightly domed but starting to flatten, bubbles are visible throughout, and the smell is mild and bread-like. If it starts to collapse and smell sharp, tangy, or vinegary, it’s gone too long without food.
Feeding Ratios (starter : water : flour):
- 1:2:2 → ready in approximately 6–8 hours at 70°F
- 1:4:4 → ready in about 10–12 hours, suitable for overnight
- 1:5:5 → ready in roughly 12–14 hours, ideal for cooler environments or extended periods.
Katie’s Tip: I use cold, filtered water from the fridge because I feed my starter before bed so it is ready in about 8-12 hours for morning baking.
To Bake and Serve the Same Day
The night before (around 9-10 pm)
Feed your starter so it’s bubbly, doubled, and domed by morning. In cooler kitchens, a 1:4:4 feeding usually works overnight.
Baking day
- 9:00 am – Mix flour and 230 g water in a large bowl until no dry bits remain. Cover and let it rest 30 minutes.
- 9:30 am – Add the ripe starter, mix it in, cover, and rest another 30 minutes.
- 10:00 am – Add the salt and the remaining 50 g water. Use your hands to pinch and fold until everything is combined.
- 10:10 am – First fold: grab a side of the dough, stretch it up, fold it toward the center. Turn the bowl and repeat all the way around.
- 10:40 am – Second fold.
- 11:10 am – Third fold.
- 11:40 am – Optional fourth fold if the dough still feels loose.
- 12:00–2:00 pm – Bulk rest. Leave the dough alone until it looks puffier, jiggles a little when you shake the bowl, and you see bubbles along the sides. It won’t double like yeast bread. About 30% bigger is perfect.
- 2:00 pm – Gently shape the dough into a round and place it seam-side up in a floured basket or towel-lined bowl. Cover and proof for 30 minutes at room temp.
- 2:30 pm – Put your Dutch oven (with the lid on) into the oven and preheat to 500°F for 30 minutes.
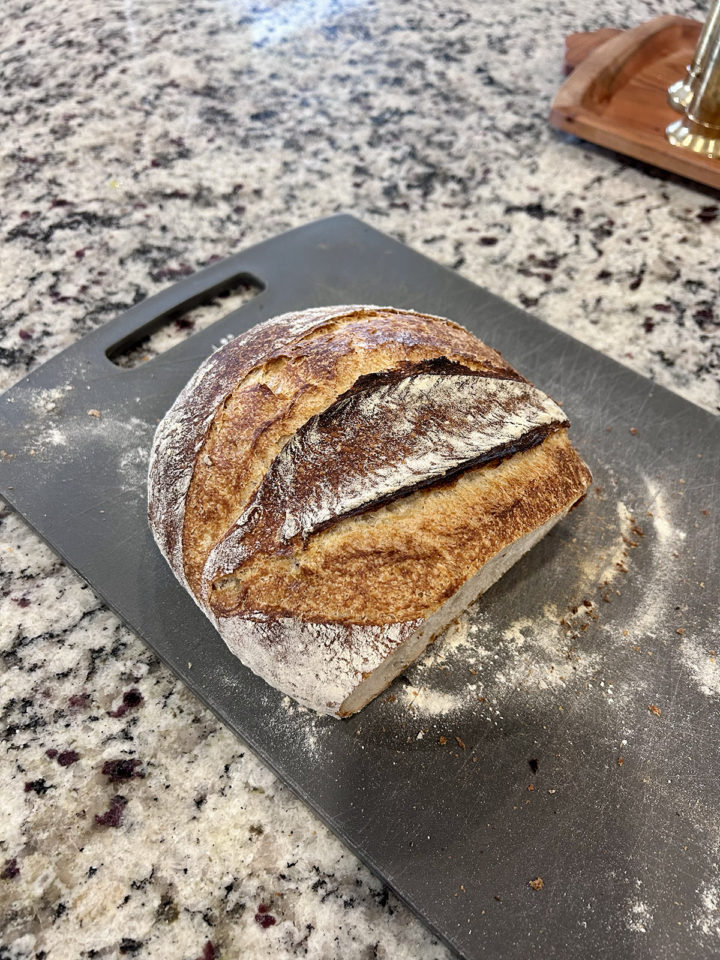
- 3:00 pm – Carefully transfer the dough into the hot Dutch oven. Bake covered for 20 minutes at 500°F. Then remove the lid, lower heat to 450°F, and bake another 25 minutes until deep golden brown.
- 3:45 pm – Take the bread out and let it cool on a rack.
- 4:30–6:00 pm – Let cool at room temperature for at least an hour before slicing. The hardest part! You’ll want to dig in right away, but the texture is so much better if you let it cool first.
Stay Inspired in the Kitchen!
Want more delicious recipes, kitchen tips, and meal inspiration? Sign up for the Good Life Eats Newsletter and get:
✔ Tried-and-true recipes—from quick weeknight meals to special occasion favorites.
✔ Seasonal meal ideas—helping you make the most of fresh, in-season ingredients.
✔ Time-saving kitchen tips—boosting your confidence and creativity in the kitchen.

Easy Sourdough Bread Recipe
An easy sourdough bread recipe for beginners! Just four ingredients and simple step-by-step instructions for a crusty, flavorful loaf you can bake at home.
Ingredients
- 400 g bread flour
- 280 g water
- 80 g ripe starter
- 8 g salt
Instructions
Mix the Dough
- In a large bowl, mix the flour and all of the water until no dry bits remain.
- The dough will look shaggy and sticky. That’s exactly what you want.
- Cover the bowl with a damp towel or reusable cover and let it rest for 30 minutes at room temperature (around 70°F).
Add the Starter
- Add the ripe starter to the bowl with the dough.
- Wet your hands so the dough doesn’t stick, then pinch and squeeze the starter into the dough until it’s fully mixed in.
- Cover and rest another 30 minutes.
Add the Salt
- Sprinkle the salt over the top of the dough.
- Pinch and fold with your hands until everything is combined.
- Cover and rest for 30 minutes.
Stretch and Fold
- Over the next 2 hours, do a set of folds every 30 minutes.
- With damp hands, grab one side of the dough, stretch it upward, and fold it into the center.
- Turn the bowl a quarter turn and repeat until you’ve folded all four sides.
Proof the Dough
- After the last fold, cover the dough and let it rest for the remaining bulk fermentation (about 2 more hours). The dough is ready when it looks puffier, jiggles slightly when you shake the bowl, and has bubbles along the sides.
- Lightly flour your counter. Gently turn the dough out so you don’t squash the air.
- Fold the edges toward the center to make a round, then flip it seam-side down.
- Using your hands, gently drag the dough toward you to tighten the surface.
- Flour a proofing basket or a towel-lined bowl, place the dough seam-side up, cover loosely, and proof at room temperature for 30–60 minutes.
Preheat the Oven
- Toward the end of proofing, place your Dutch oven with the lid into the oven and preheat to 500°F for at least 30 minutes so it’s fully heated.
Score and Bake
- When the dough is ready, cut a piece of parchment big enough to lift the loaf.
- Place it over the basket, then flip the dough onto the parchment so it’s seam-side down.
- Dust off any extra flour.
- Score the top with a sharp knife or lame, about ½ inch deep, to give it room to expand in the oven.
- Carefully lift the parchment and dough into the hot Dutch oven.
- Cover with the lid and bake for 20 minutes at 500°F.
- Then remove the lid, lower the oven to 450°F, and bake another 25 minutes until the crust is deep golden brown.
Cool and Slice
- Lift the bread out of the Dutch oven and cool on a wire rack.
- Wait at least 1 hour before slicing. Cutting too soon will make the inside gummy.
Notes
- Flour: Bread flour works best for beginners, but all-purpose can be used in a pinch (the dough may be a little stickier).
- Water: If you don’t have filtered water, let tap water sit out overnight to let chlorine dissipate.
- Starter: Make sure your starter is at peak activity. It should be bubbly, doubled, and domed before mixing your dough.
Recommended Products
As an Amazon Associate and member of other affiliate programs, I earn from qualifying purchases.


Nutrition Information:
Yield: 8 Serving Size: 1Amount Per Serving: Calories: 181Total Fat: 1gSaturated Fat: 0gTrans Fat: 0gUnsaturated Fat: 0gCholesterol: 0mgSodium: 390mgCarbohydrates: 36gFiber: 1gSugar: 0gProtein: 6g
GoodLifeEats.com offers recipe nutritional information as a courtesy. This provided information is an estimate only. This information comes from online calculators. Although GoodLifeEats.com makes every effort to provide accurate information, these figures are only estimates.


Leave a Comment