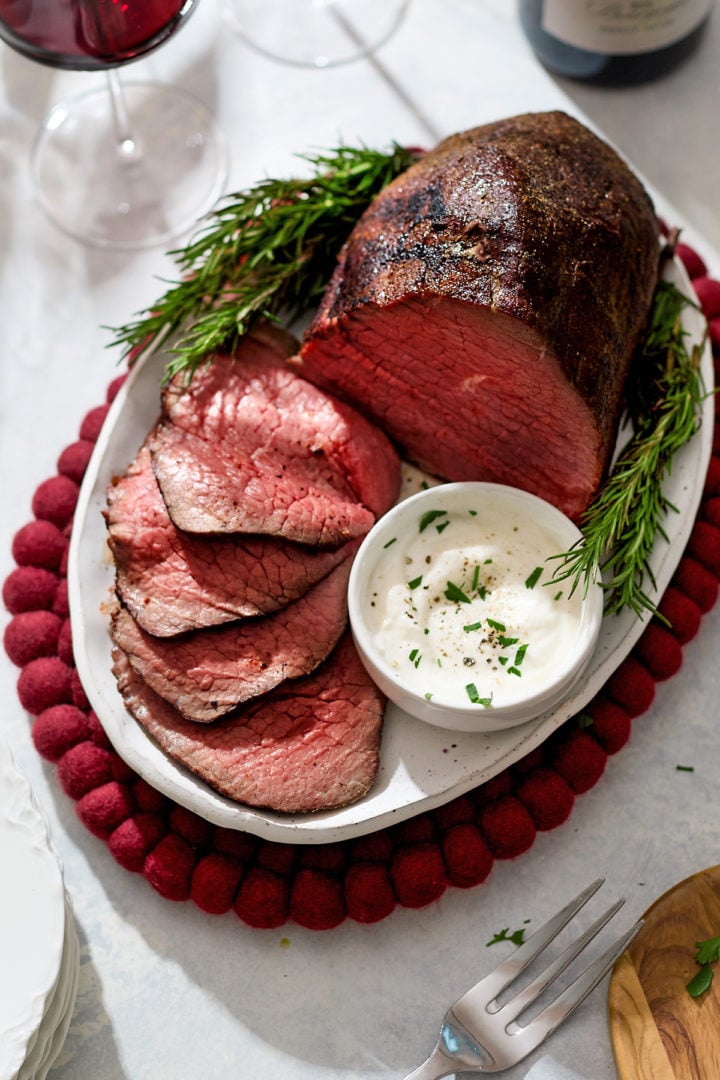
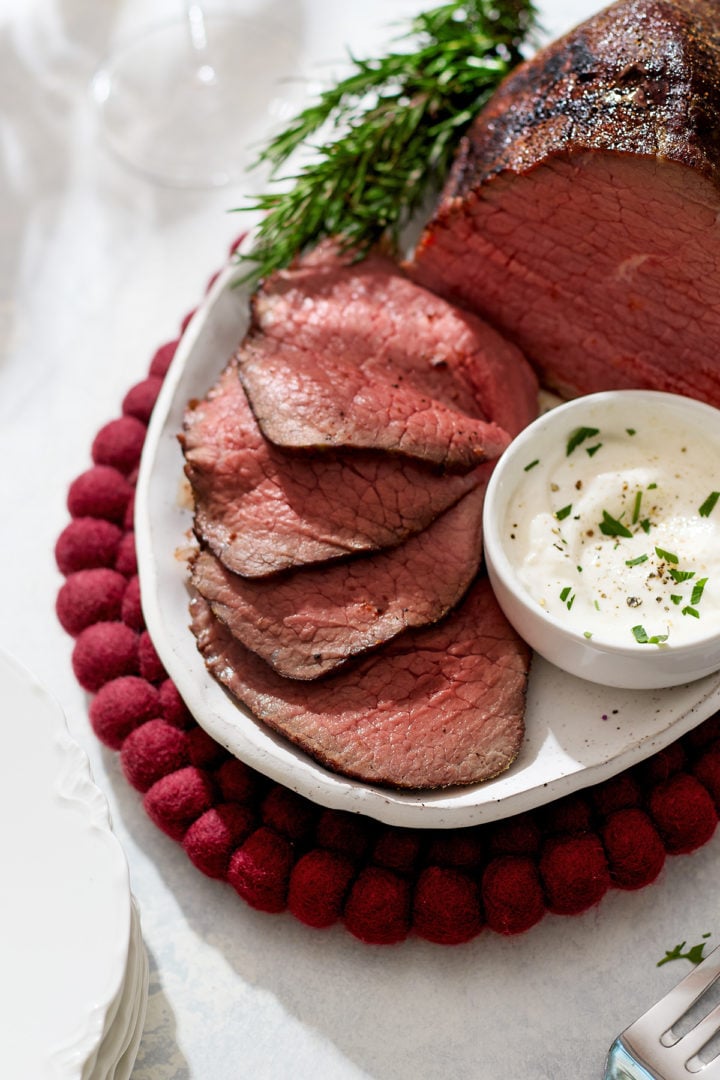
Rosemary Roast Beef
Homemade roast beef using an eye round roast is a simpler and cheaper alternative to prime rib at Christmas! My Rosemary Roast Beef recipe first dry brines the meat with a simple blend of seasonings before roasting low and slow in the oven. It’s a nearly foolproof method that any home cook can follow!
This post may include affiliate links. As an Amazon Associate and member of other affiliate programs, I earn a small commission from qualifying purchases.
This Eye of Round Roast Beef Is So Tender It Practically Melts in Your Mouth!
We love making prime rib around the holidays, but since it’s one of the most expensive cuts of beef on the market I tend to shy away from making it too often. Instead, I’ll make this eye round roast beef, which provides a similarly tender and juicy slice of slow-cooked beef at a fraction of the price.
Here’s why I think you’ll love this homemade roast beef as much as we do:
✔ Budget-Friendly Holiday Entree: If you shop for your eye round roast at places like Costco, you can usually purchase it for around $7/lb, which is much cheaper than other favorite cuts of beef that are served around the holidays, like prime rib and filet mignon.
✔ Simple Dry Brine: The beef is rubbed all over with a seasoning blend and chilled in the fridge overnight to dry it out. This creates the most incredible sear later on!
✔ Planned Leftovers: This recipe calls for a 3-pound eye round roast, which will feed 4 to 6 people. I always wind up with leftovers, which I turn into roast beef sandwiches over the next several days.
Enjoy!
-Katie
Katie’s Tip: Buy an Eye of Round Roast
Eye of round roast is an economical cut of beef with a good amount of flavor and minimal fat. To keep the beef moist and tender, I suggest dry brining it overnight to lock in moisture and season it thoroughly.
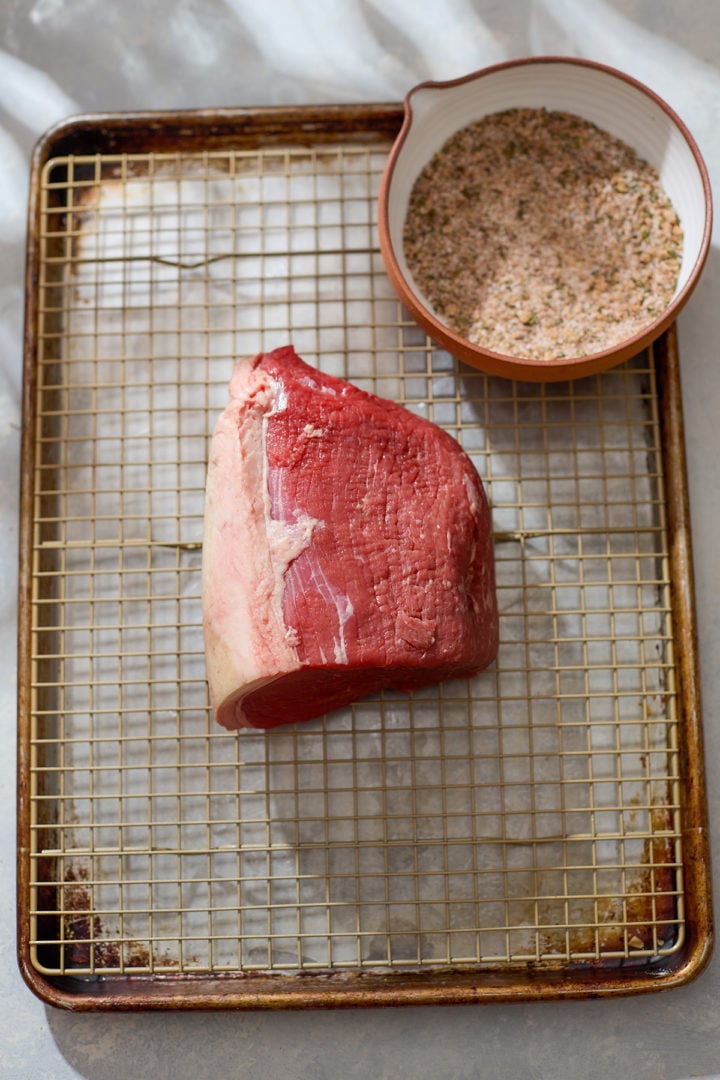
You’ll want a 3-pound roast (give or take). I prefer to purchase mine at Costco since the quality is great and the price is a little lower than a standard grocery store.
Ingredients for the Dry Brine
A full list of ingredients with their measurements can be found in the recipe card below, but here’s a high-level overview of what you’ll need to make this melt-in-your-mouth eye round roast beef.
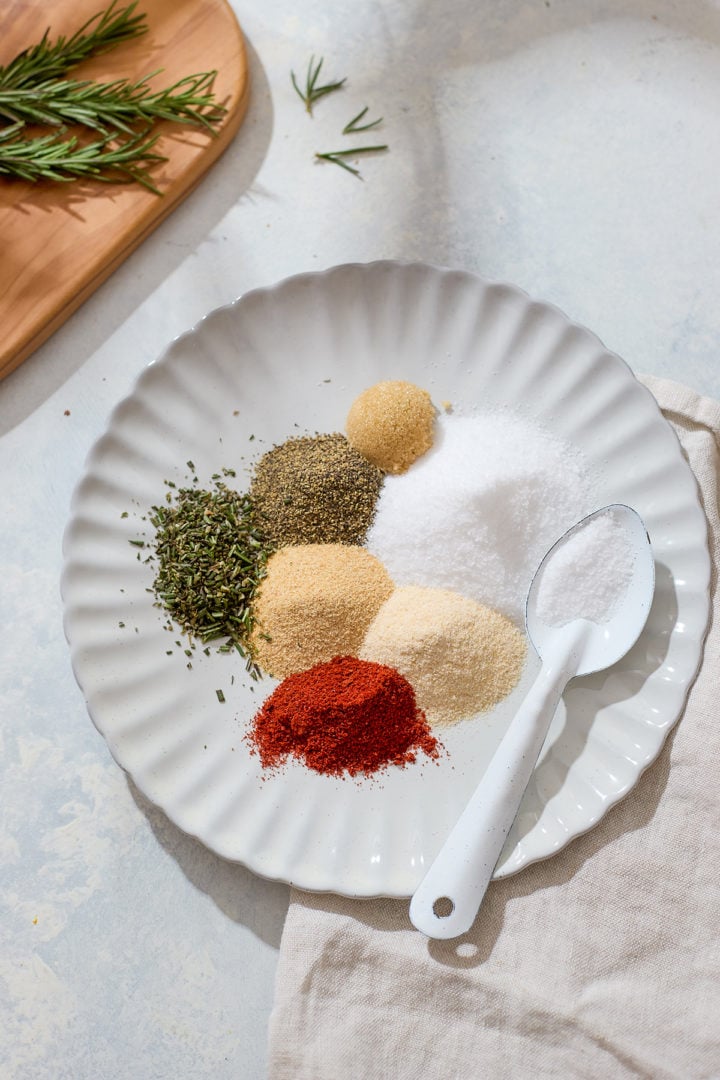
- Kosher Salt and Black Pepper — Don’t use table salt, which has much smaller grains and therefore tastes much saltier.
- Dried Herbs and Spices — Garlic powder, onion powder, paprika (smoked or sweet), and dried rosemary are all you need to season and dry brine the roast beef.
- Brown Sugar — Just a pinch rounds out the flavor profile and makes for a gorgeous golden sear on the outside of your beef.
How to Make Roast Beef in the Oven
- Dry brine the eye round roast overnight. This sounds so complicated, but all you have to do is rub the seasoning mixture all over the beef and then chill it overnight uncovered. This exposes the beef to the air and dries it out, which is what you want!
- Rest at room temperature before roasting. About 1 hour or so should be enough time to bring the beef up to room temperature. This helps it roast evenly in the oven.
- Roast low and slow at 225°F. An instant read thermometer is essential for telling when your roast beef has reached the desired level of doneness.
- Rest for 20 minutes before slicing. This is super important! The beef needs time to rest so the juices can settle back into the meat.
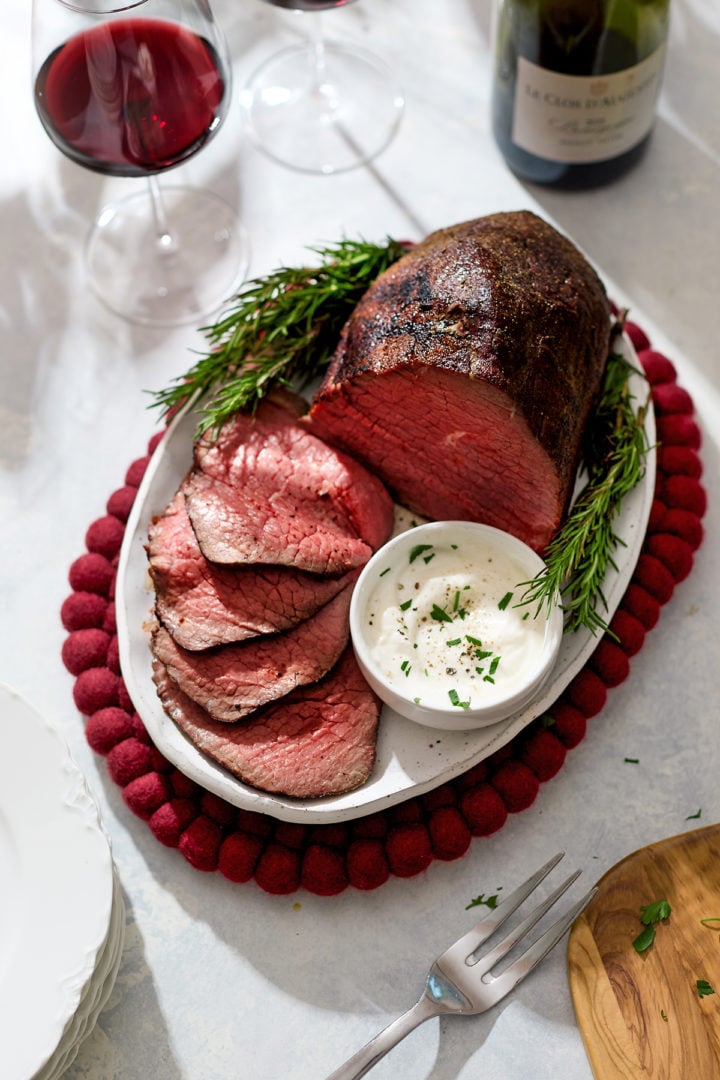
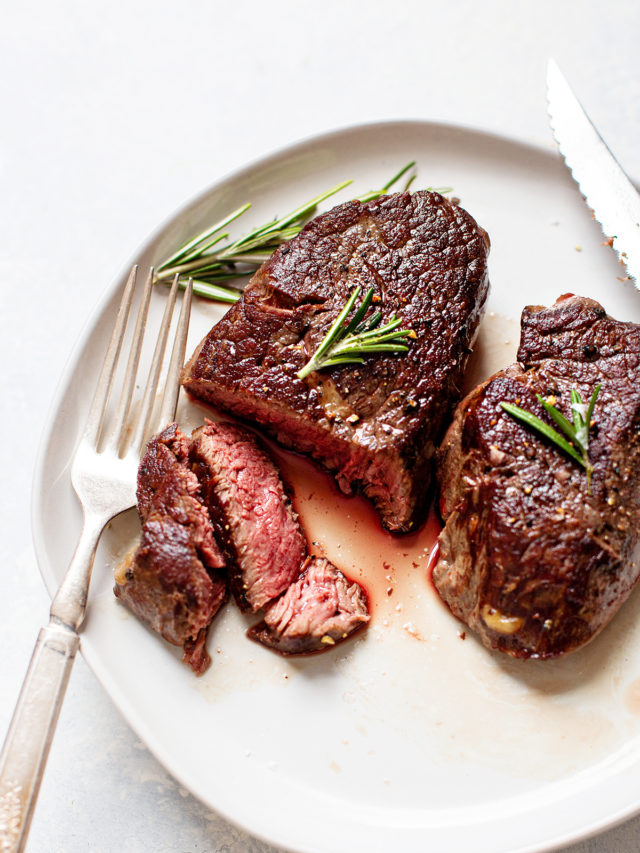
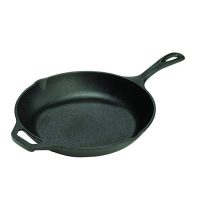
- Sear to create a golden crust. I’ll do this in a screaming hot cast iron skillet on the stovetop. You only need to sear the roast beef for a minute or so on each side to give it a nice crust.
Internal Temps and Cook Times to Remember
Cook the eye of round roast in the oven at 225°F until the internal temperature reaches 125°F for rare or 130°F for medium-rare.
Expect this to take anywhere between 60 to 90 minutes for a 3-pound roast (it depends on how evenly your oven cooks and how thick your roast is).
Always use an instant-read thermometer and check in the very center for accuracy.
Serving Suggestions
You can pair this homemade roast beef with a few different accompaniments, depending on the style of meal you’re going for:
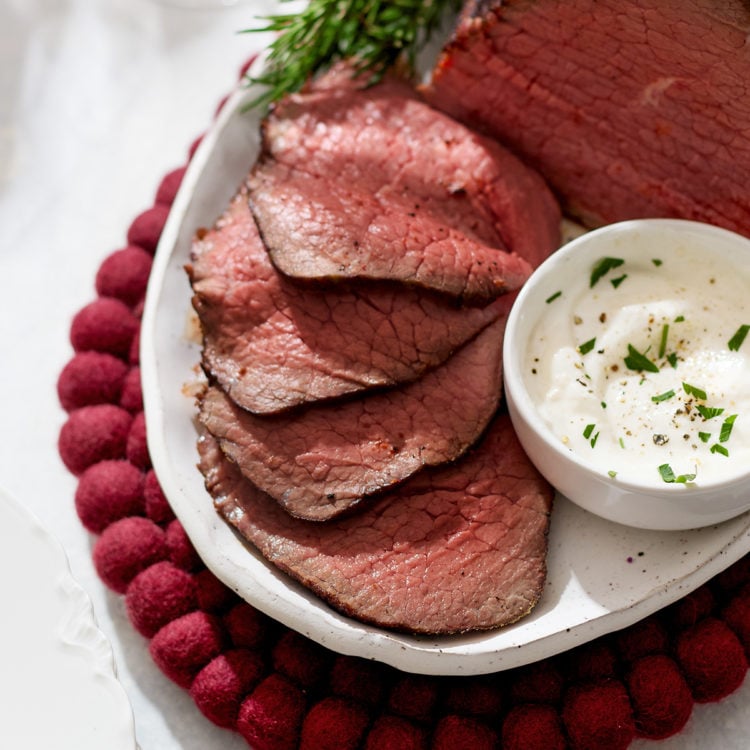
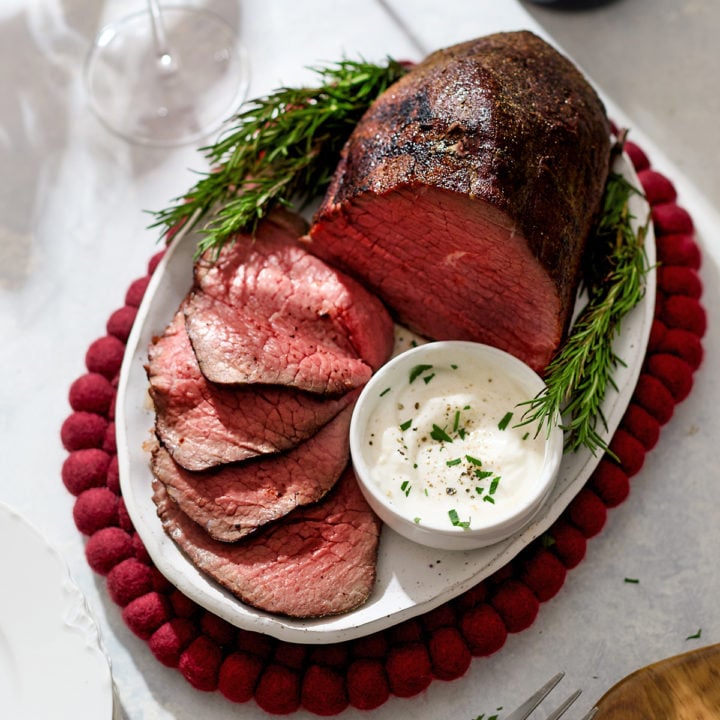
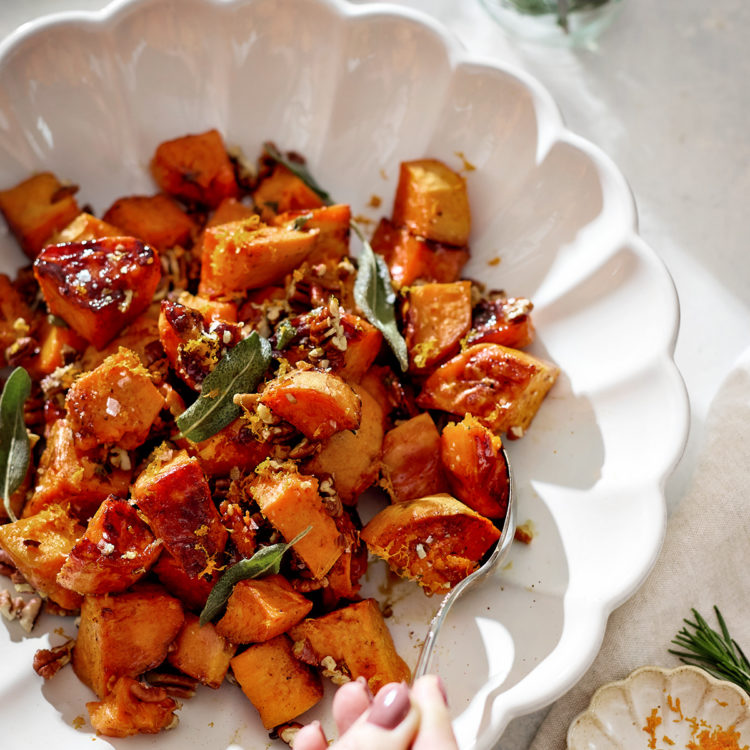
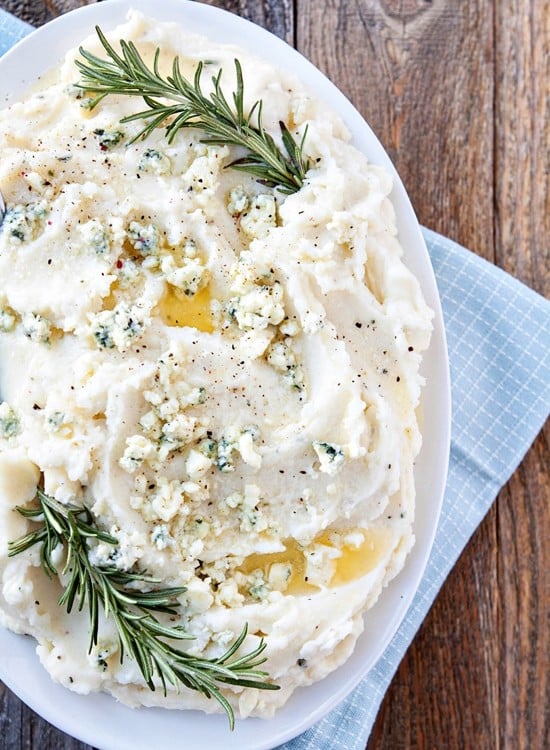
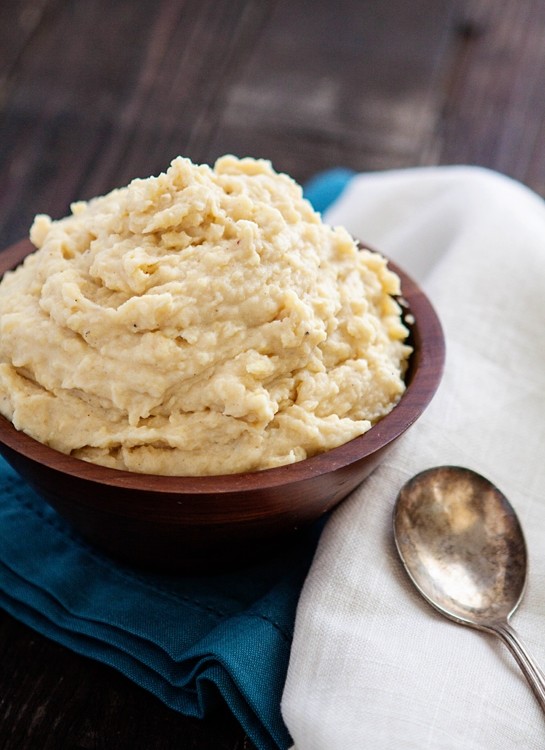
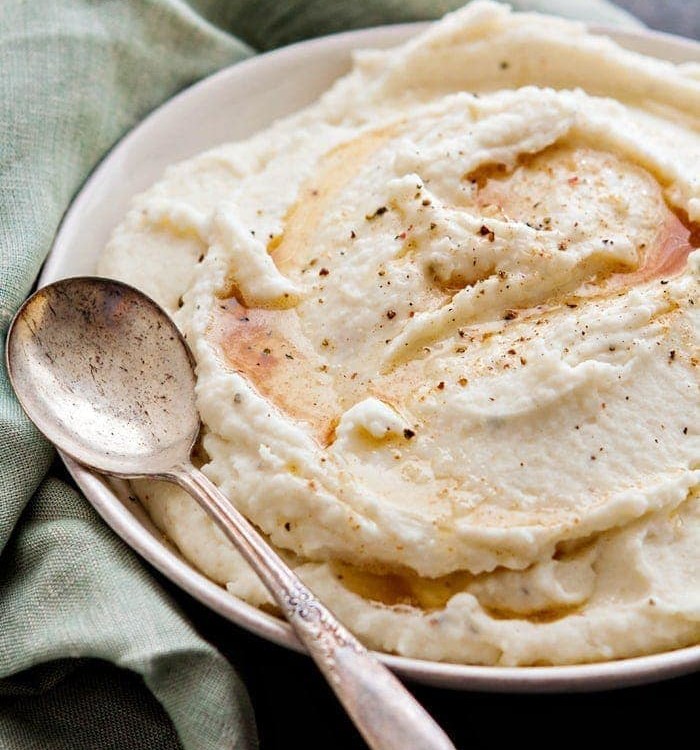
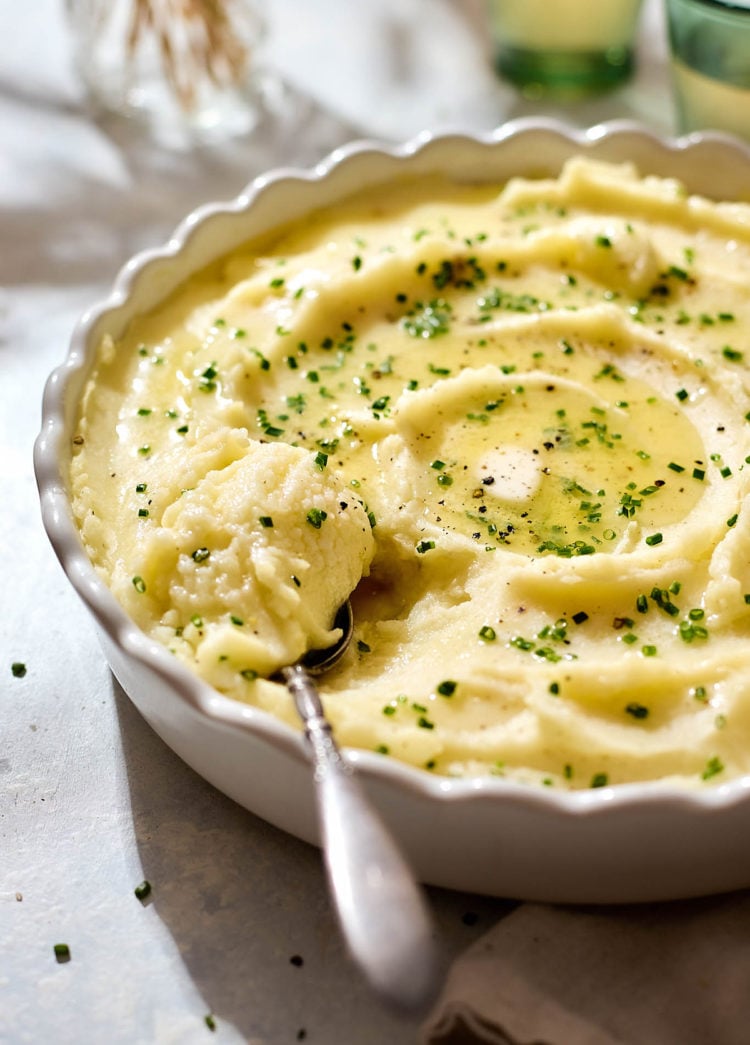
- Horseradish Sauce: The classic partner for roast beef! Creamy, sharp, and just spicy enough, horseradish sauce cuts through the richness of the meat and adds brightness. It’s especially good if you’re serving the roast as a centerpiece with simple sides like mascarpone mashed potatoes and cranberry green beans.
- Au Jus: Light and savory, au jus is a brothy pan sauce that highlights the beef’s natural flavor without weighing it down. It’s the best option if you want an elegant, restaurant-style presentation. Just use the pan drippings plus broth and aromatics for flavor, then serve it in small cups for dipping or spooning over the meat.
- Gravy: If you’re serving roast beef as a cozy dinner with mashed potatoes or roasted vegetables, gravy is the heartiest choice. You can follow my turkey gravy tutorial and simply swap in the beef drippings and beef broth instead of the turkey components.
- For special occasions, you can even offer both: a lighter au jus for dipping and a creamy horseradish sauce for contrast.
Storage Instructions
Leftovers can be stored in an airtight container in the refrigerator for up to 4 days. If you’ve sliced it for sandwiches, keep the slices stacked with parchment between layers to prevent sticking.
The whole roast can also be wrapped tightly and frozen for up to 2 months; thaw in the refrigerator overnight before reheating gently or slicing for cold sandwiches.
More Holiday Beef Recipes
Stay Inspired in the Kitchen!
Want more delicious recipes, kitchen tips, and meal inspiration? Sign up for the Good Life Eats Newsletter and get:
✔ Tried-and-true recipes—from quick weeknight meals to special occasion favorites.
✔ Seasonal meal ideas—helping you make the most of fresh, in-season ingredients.
✔ Time-saving kitchen tips—boosting your confidence and creativity in the kitchen.
Eye of Round Roast Beef Recipe
My rosemary roast beef recipe first dry brines the meat with a simple blend of seasonings before roasting low and slow in the oven. It’s a nearly foolproof method that any home cook can follow!
Ingredients
- 3 pounds eye of round roast
- 1 tablespoon kosher salt
- 1 teaspoon black pepper
- 1 teaspoon garlic powder
- 1 teaspoon onion powder
- ½ teaspoon smoked paprika or sweet paprika
- ½ teaspoon dried rosemary (or 1 ½ teaspoon very finely minced fresh rosemary)
- ½ teaspoon brown sugar
Instructions
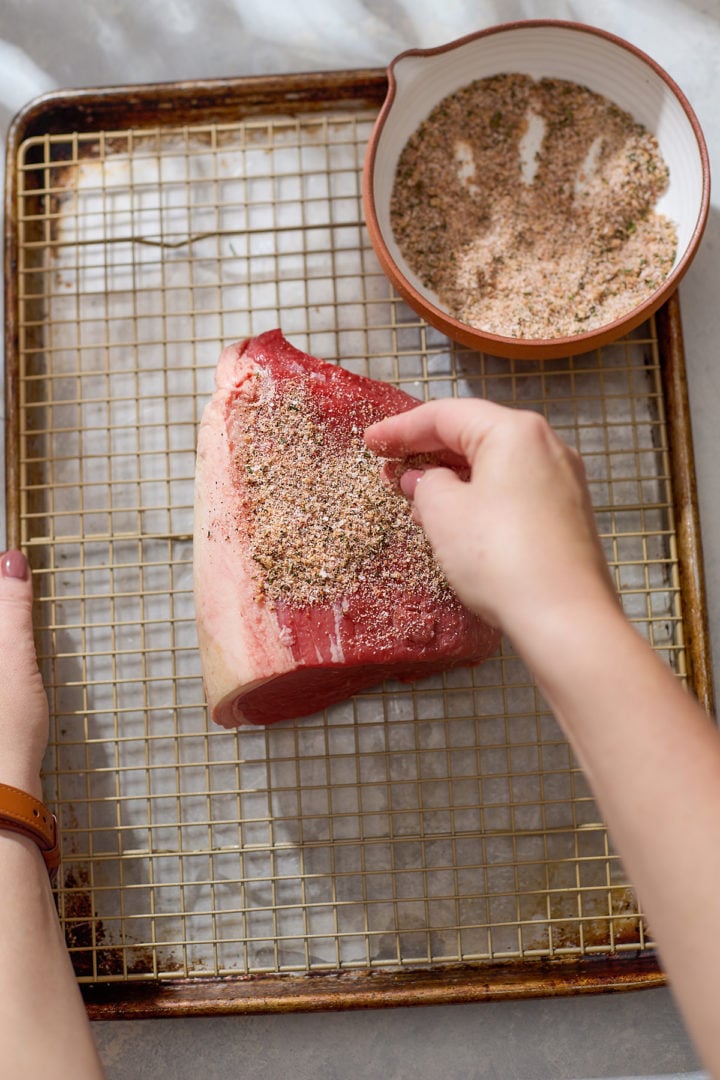
- Pat a 3-pound eye of round roast dry on all sides with paper towels. In a small bowl, stir together 1 tablespoon kosher salt, 1 teaspoon black pepper, 1 teaspoon garlic powder, 1 teaspoon onion powder, ½ teaspoon smoked or sweet paprika, ½ teaspoon dried thyme or rosemary, and ½ teaspoon brown sugar.
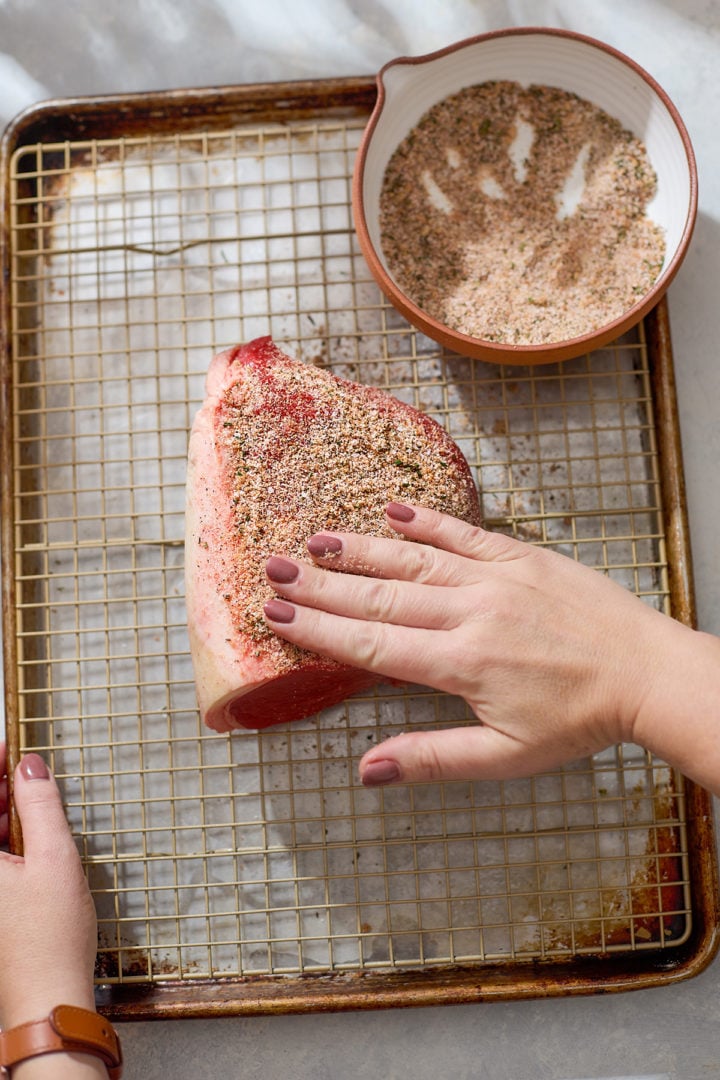
- Rub this mixture evenly over the roast, making sure to cover the ends as well as the sides.
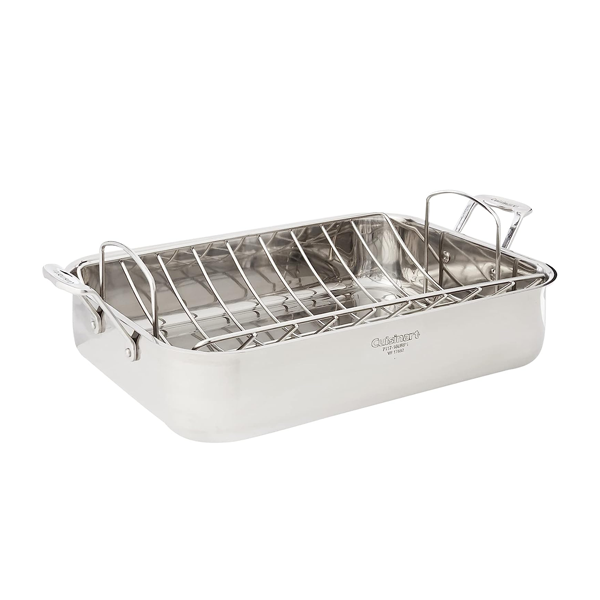
- Set the roast on a wire rack inside a roasting pan and refrigerate it uncovered overnight. This dry brine not only seasons the meat deeply but also dries the surface so it will brown more easily later.
- The next day, take the seasoned roast out of the refrigerator and let it sit at room temperature for about 1 hour.
- Preheat your oven to 225°F.
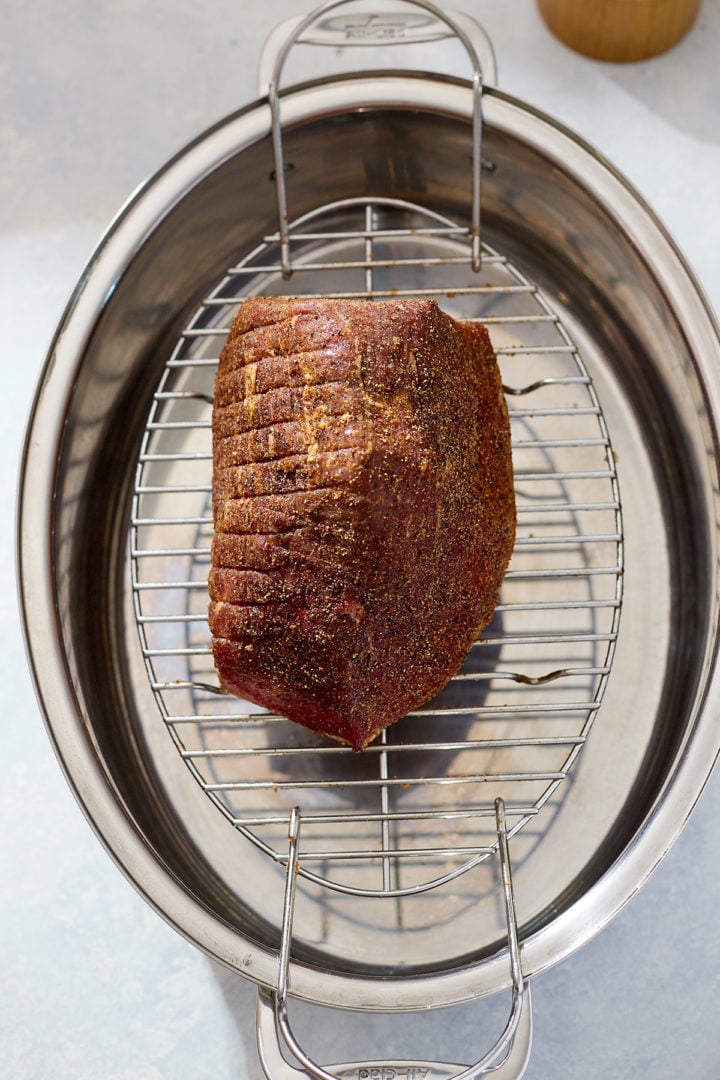
- Make sure the roast is still on the rack in the roasting pan so the air can circulate all around it and prevent the bottom from steaming.
- Place the roast in the oven and cook at 225°F until the internal temperature reaches 125°F for rare or 130°F for medium-rare. This usually takes 60 to 90 minutes for a 3-pound roast, depending on thickness and your oven. If you prefer closer to medium, continue cooking until the roast reaches 135°F, knowing that this lean cut will be firmer at that temperature. Always use an instant-read thermometer and check in the very center for accuracy.
- When the roast reaches your target temperature, transfer it to a cutting board and tent it loosely with foil.
- Let it rest for 20 to 25 minutes. This step is crucial—the juices settle back into the meat instead of spilling out when you slice it, leaving you with juicier roast beef.
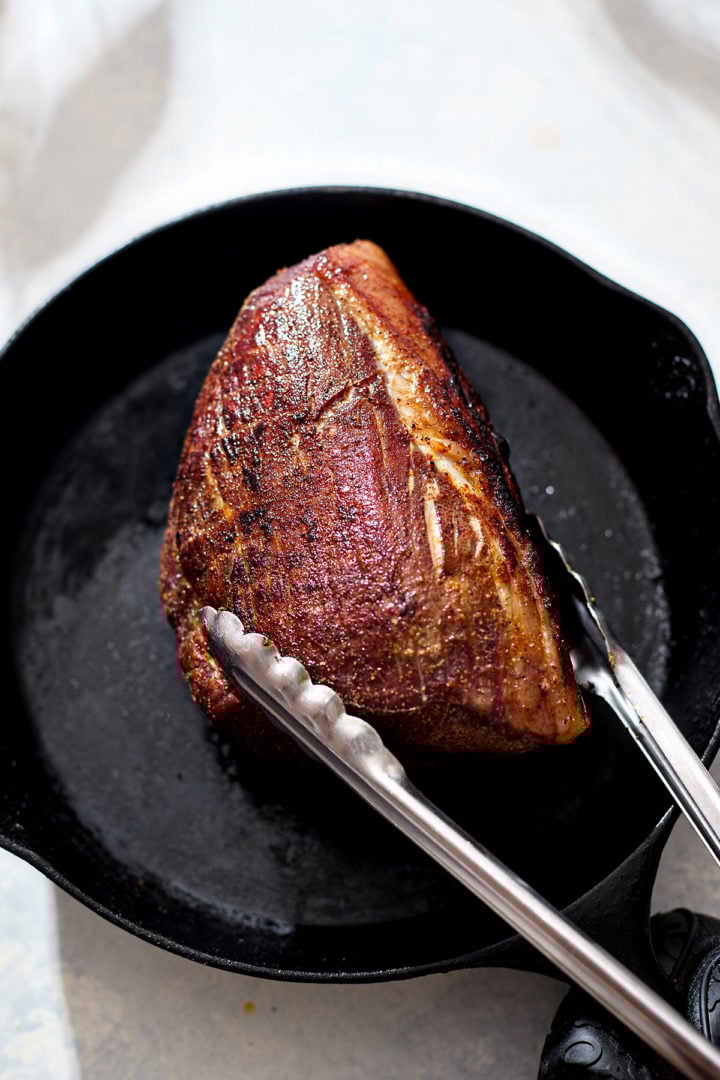
- While the roast rests, heat a cast-iron or other heavy skillet over high heat until very hot.
- Just before searing, pat the roast dry again with paper towels—any surface moisture will steam and keep it from browning.
- Place the roast in the hot skillet and sear for 60 to 90 seconds per side until a deep brown crust forms.
- Turn the roast so all the sides get color. Transfer the roast back to a cutting board.
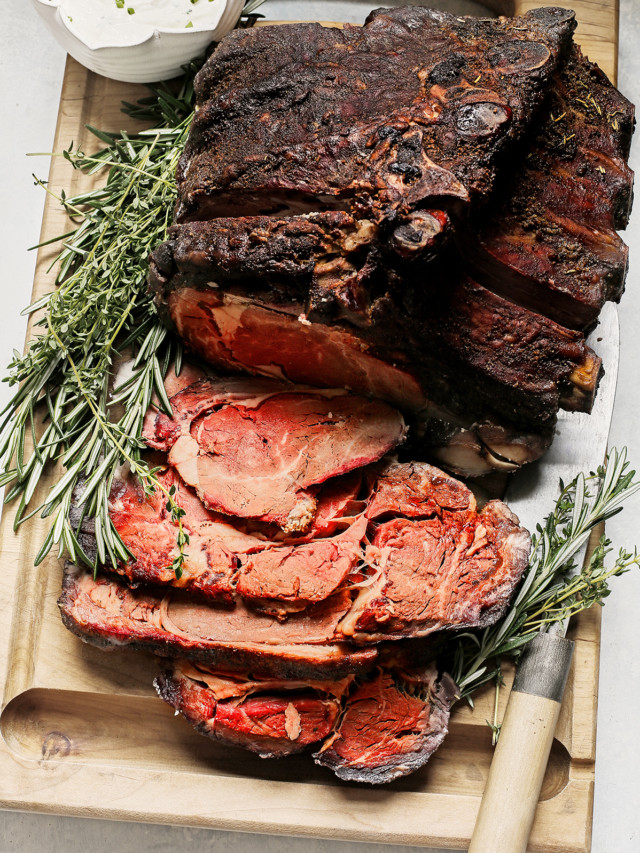
- If you’re serving this as a dinner roast, slice it after searing and resting. Find the direction of the grain in the meat, then slice thinly across the grain with a long, sharp slicing knife.
- Aim for slices about ⅛ inch thick, which will be tender even with this lean cut. Arrange the slices on a platter and serve with your horseradish sauce alongside.
Seasoning the Roast
Cooking the Roast
Resting the Roast
Searing for the Crust
Slicing for Dinner
Notes
To slice this roast beef for sandwiches:
- Let it cool completely after searing, then refrigerate it for at least 4 hours or overnight. Chilling firms the roast so you can slice it cleanly.
- With a meat slicer, cut paper-thin slices about 1/16 inch.
- If slicing by hand, use a very sharp knife and cut as thinly as you can across the grain, keeping your guiding hand flat on top of the roast to steady it. Slice while the roast is still cold for deli-style results.
Recommended Products
As an Amazon Associate and member of other affiliate programs, I earn from qualifying purchases.

Nutrition Information:
Yield: 6 Serving Size: 1Amount Per Serving: Calories: 359Total Fat: 16gSaturated Fat: 6gUnsaturated Fat: 8gCholesterol: 143mgSodium: 536mgCarbohydrates: 1gFiber: 0gSugar: 0gProtein: 48g
GoodLifeEats.com offers recipe nutritional information as a courtesy. This provided information is an estimate only. This information comes from online calculators. Although GoodLifeEats.com makes every effort to provide accurate information, these figures are only estimates.
Try Making Roast Beef at Home!
Did You Try This Recipe? I’d love to hear how it turned out! Leave a comment and a review below—your feedback helps others and makes my day.
Share Your Creations!
If you took a photo, tag me on Instagram @goodlifeeats and use #goodlifeeatsrecipes—I’d love to see what you’re cooking up in your kitchen!


Leave a Comment