
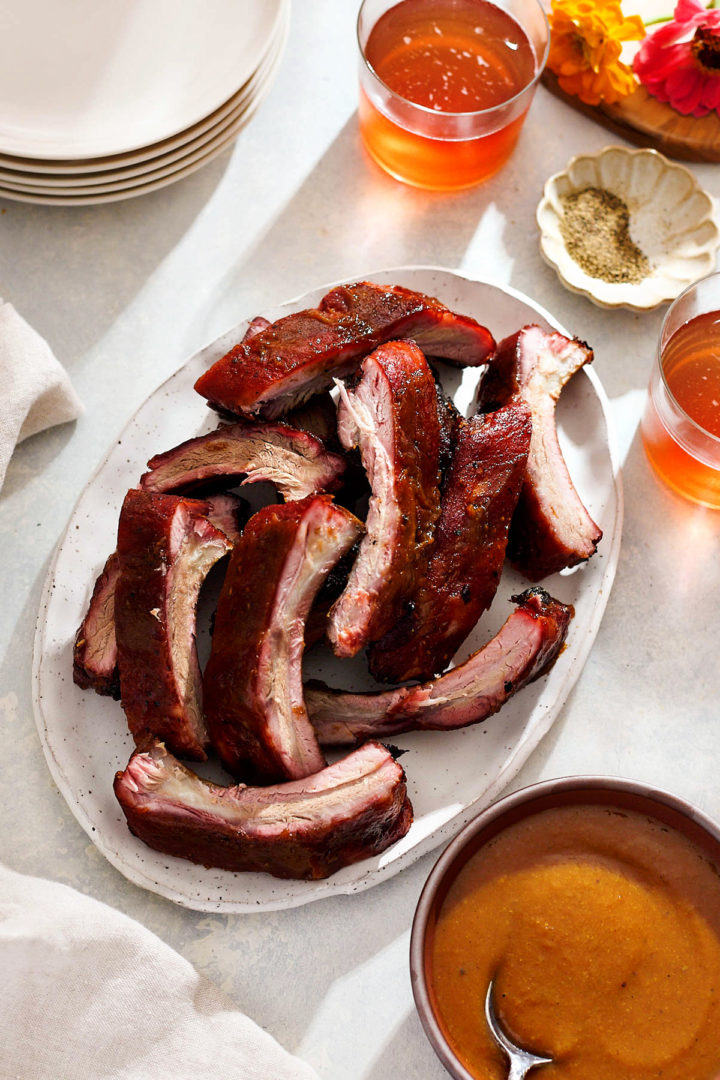
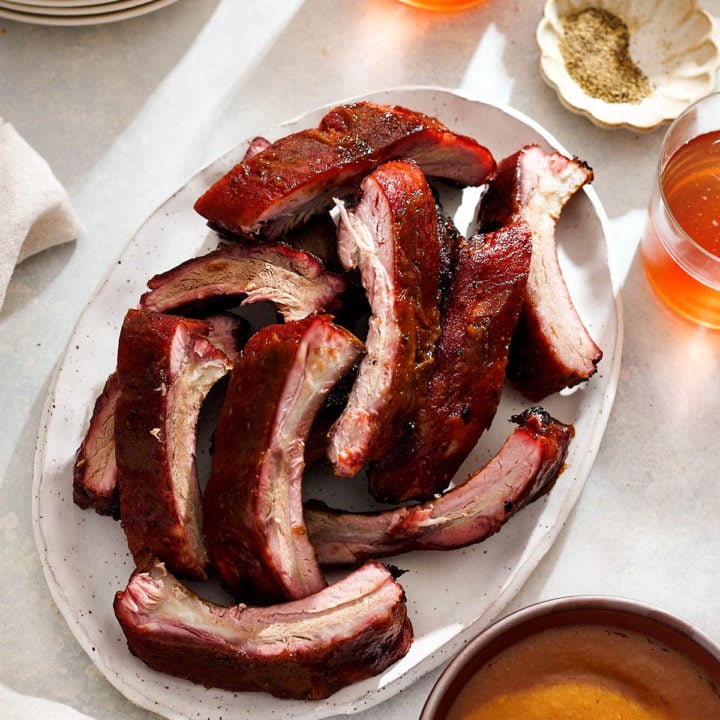
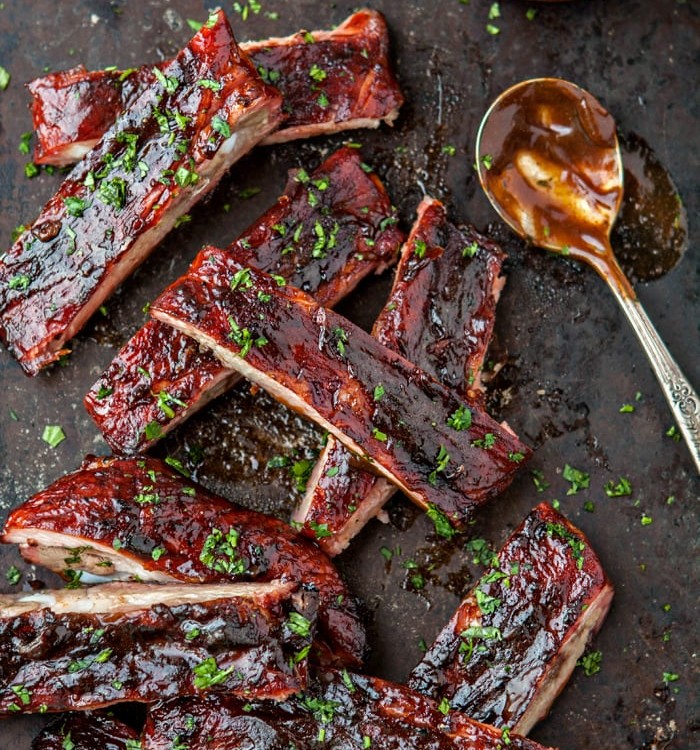
Smoked Baby Back Ribs
This is my tried and true method for perfectly Smoked Baby Back Ribs every time. The dry rib rub, mustard slather, and 3-2-1 smoking method combine to create ultra tender ribs that work with any bbq sauce you like! (A gas grill adaptation is also provided in the recipe card below.)
The 3-2-1 Method Is My Favorite for Smoking Baby Back Ribs
I’ve been smoking baby back ribs on my Traeger pellet grill using the 3-2-1 method since 2009, when I initially shared this recipe.
Over the years, I’ve tweaked the rib rub and bbq sauce components of this recipe quite a bit, and with time I can safely say I’ve perfected the smoking temperatures and cook times so that my ribs come out perfect every single time.
If you’re unfamiliar with the 3-2-1 ribs method, here’s how it works:
- First 3 hours: The ribs are smoked unwrapped to create a deep, smoky flavor and to crisp up the edges.
- Next 2 hours: The ribs are wrapped in parchment paper to tenderize them.
- Last hour: The ribs are brushed with bbq sauce and cooked until caramelized and sticky.
This is THE BEST way to cook baby back ribs, and I think you’re going to love this easy-to-follow recipe as much as my family does!
Happy Barbecuing!
-Katie
Equipment I Recommend
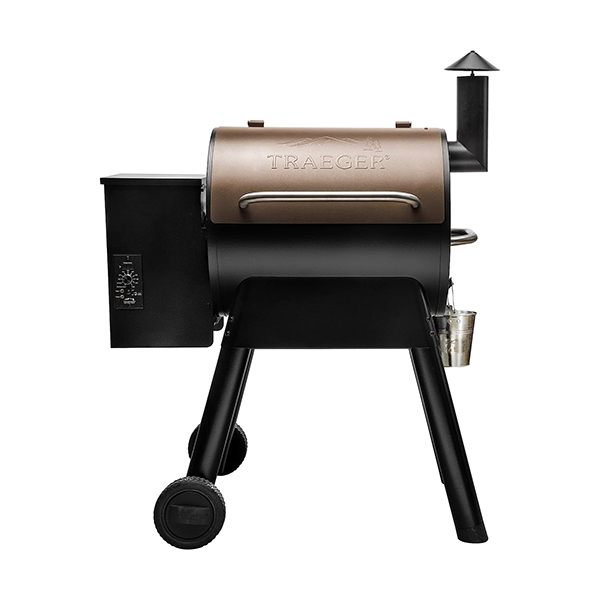
- Pellet Grill or Traeger: We’ve used our Traeger for years and I couldn’t recommend it more! It’s perfect for smoking all sorts of meats and veggies.
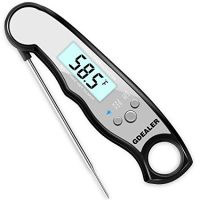
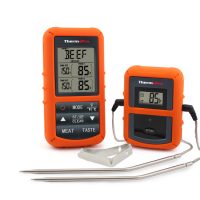
- Probe Thermometer: Essential for tracking your ribs’ internal temperature without opening the lid. Many models also include a second probe for monitoring your grill’s ambient temperature — this helps ensure your smoker is running steady. If you regularly use your grill or smoker, the Meater thermometer is worth the splurge.
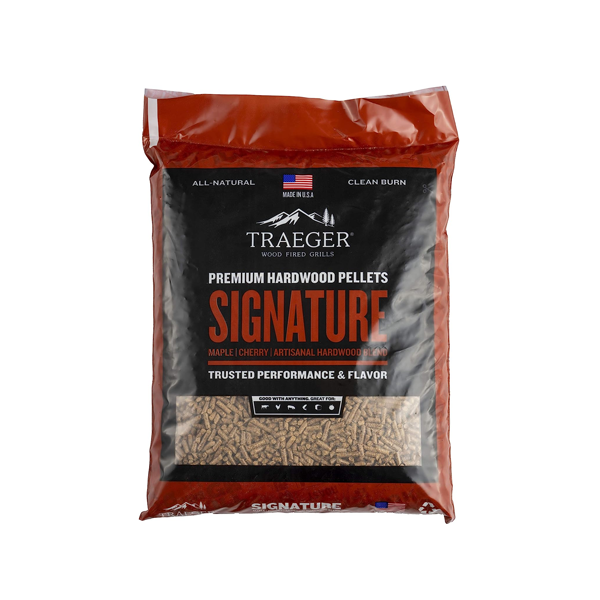
- Wood Pellets: Apple wood pellets are my go-to for pork ribs. They give a mild, fruity sweetness that complements the pork’s natural flavor and reinforces the peach BBQ sauce without overpowering. Cherry or maple are good alternatives.
- Parchment Paper or Butcher Paper: If you prefer your ribs with a great bark, wrap them in unwaxed butcher paper instead of foil. It’s breathable, so the bark stays intact while still locking in enough moisture for tenderness.
- Aluminium Foil (Optional): Only wrap your ribs in foil if you want them super soft, tender all the way through, and falling off the bones. They’ll still be tender when using parchment or butcher paper, but they won’t be falling off the bones tender. Foil traps steam and speeds up the cooking, but you’ll sacrifice some bark.
The Main Ingredients
I’ve listed all of the ingredients and their measurements in the recipe card below, but I wanted to quickly touch on the main components of this smoked ribs recipe.
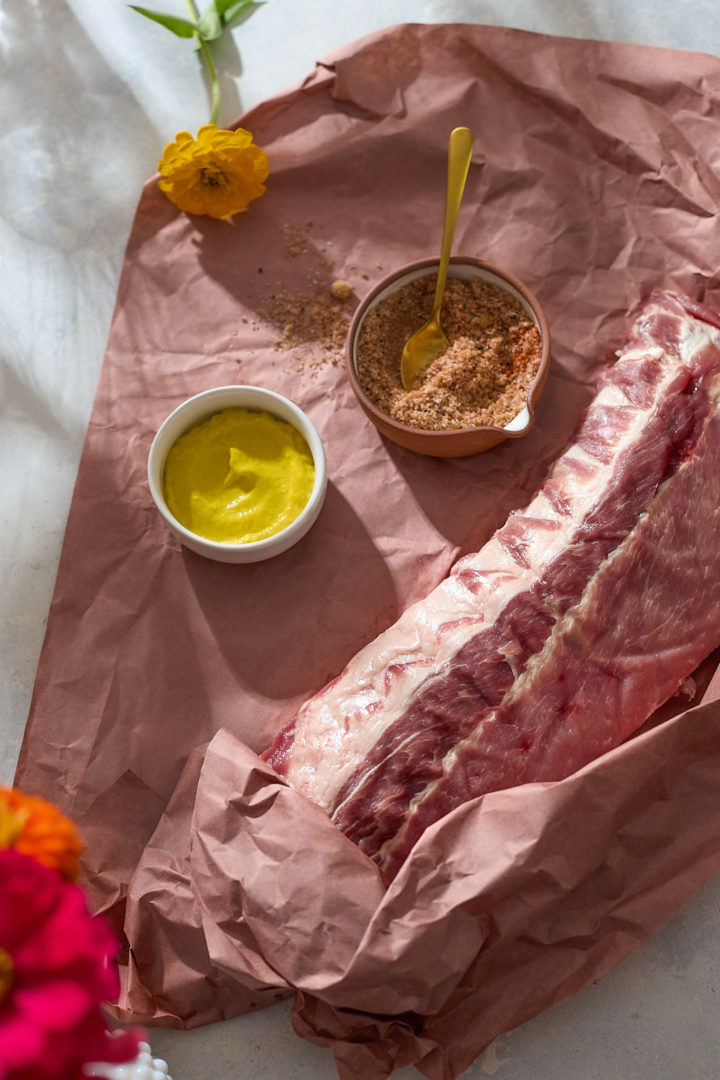
- The Ribs: You’ll be using 2 racks of baby back pork ribs for this recipe, which is roughly 6 pounds. I’ve given instructions on how to remove the silver skin from the ribs, so be sure to do that first!
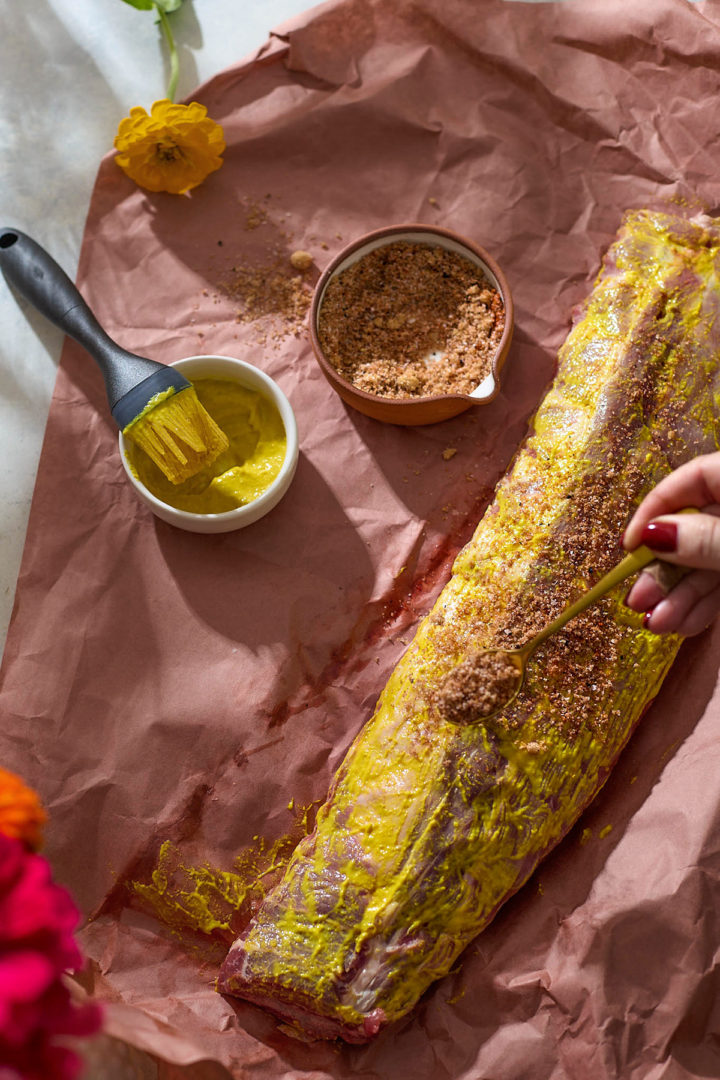
- The Dry Rub: My favorite rib rub is a simple combination of brown sugar, smoked paprika, kosher salt, and pepper. The goal is to season and tenderize the ribs without masking their natural flavor.
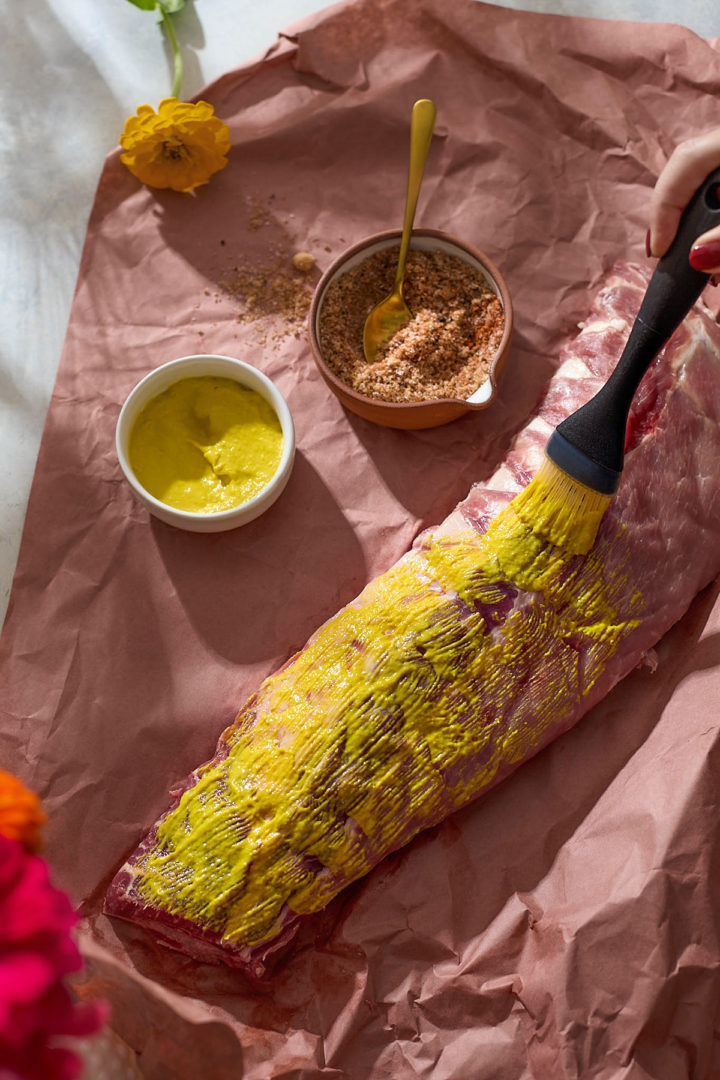
- The Mustard Slather: Rubbing the ribs with yellow mustard helps the dry rub stick to the ribs and creates a better bark while they smoke.
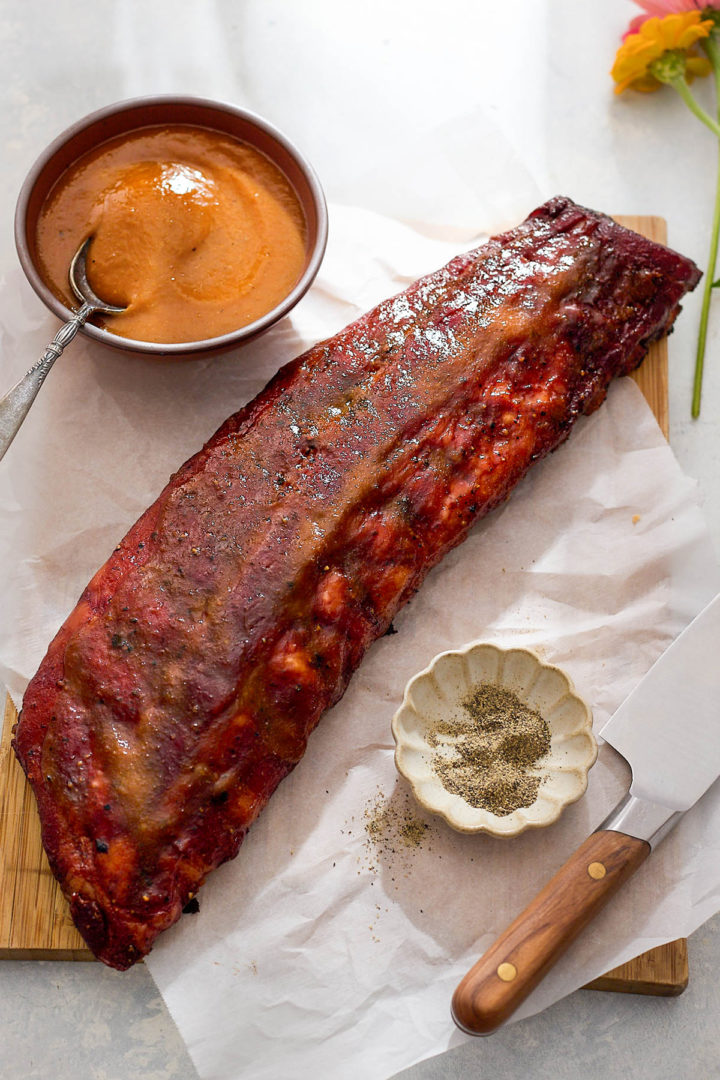
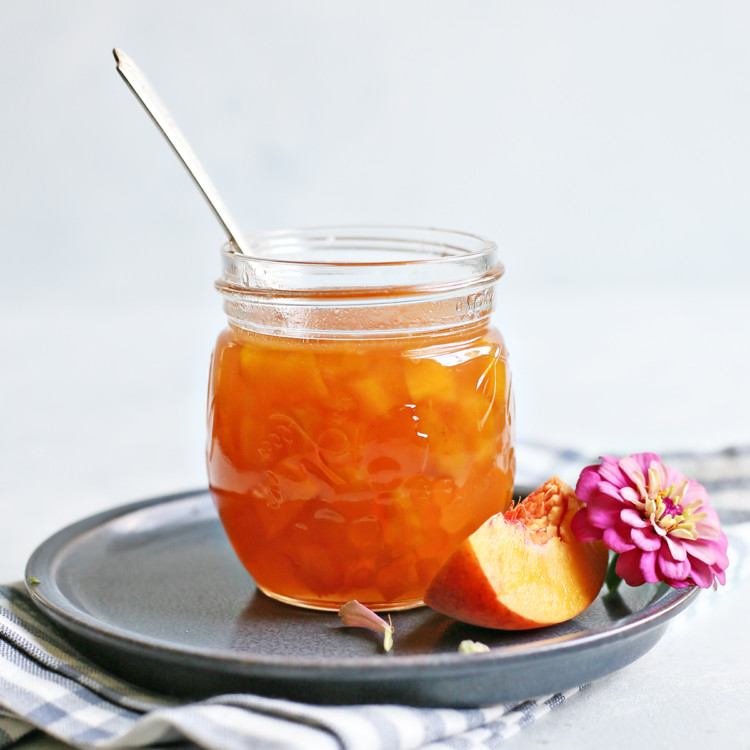
- The BBQ Sauce: I’ve shared my all-time favorite peach bbq sauce recipe, but you may use any bbq sauce you like.
How to Smoke Baby Back Ribs Using the 3-2-1 Method
In my humble opinion, this is THE way to smoke baby back ribs. I’ve been cooking ribs this way for years, so trust me when I say the results are phenomenal every time! Here’s a quick summary, but you can find all the details in the printable recipe card at the bottom of this post:
- Prep the ribs: You need to slide a paring knife under the silver skin along the bones and peel it off.
- Slather with mustard, then season with the dry rub. Let the ribs hang out on your counter as the smoker preheats. You want them to be at room temperature before transferring to your pellet grill.
- First 3 hours: Smoke unwrapped at 1600°F to 180°F. I like to spritz my ribs with water or apple juice every hour to keep them moist, but that step is optional.
- Next 2 hours: Increase the temperature to 225°F, wrap the ribs in parchment paper, and keep smoking to tenderize them.
- Last hour: Unwrap the ribs, slather on the bbq sauce, and cook until the sauce is glossy.
Katie’s Tip: Always rest your smoked ribs before serving! Just 10 minutes on a platter (loosely tented with foil) is all they need to give the juices time to redistribute.
Notes for Success
- Begin prep (trimming, membrane removal, seasoning) by 11:30 AM so you’re ready for a full afternoon cook.
- Use temperature as a guide, but tenderness is the real test: ribs should probe like softened butter. Aim for ~195°F before unwrapping, and finish between 200–205°F.
- Warm sauce gently before glazing for easy brushing and a glossy finish.
- Glaze only in the final hour to avoid burning the sugars in the sauce.
- After the final glaze, rest ribs loosely tented for 10–15 minutes before slicing so juices settle and bark stays intact.
Testing to See If the Ribs Done
- Bend Test: Pick up the rib rack with tongs and gently bounce it. Does the surface crack or split slightly? If so, the ribs are perfectly tender.
- Bone Pull: Does it look like the meat has shrunk back from the bones by ¼ to ½ inch? That’s what you want!
- Toothpick Test: Slide a toothpick between the bones. Does it meet with any resistance? If so, keep cooking! Ribs are done when the toothpick slides in effortlessly.
Katie’s Tip: Your Cooking Timeline
Want to make ribs for dinner and eat by 6:00 pm? Here is an example of my typical rib cooking timeline:
- 12:00–3:00 PM: Smoke ribs at 1600°F – 180°F (3 hours)
- 3:00–5:00 PM: Wrap in parchment or butcher paper and continue to cook at 225°F for 2 hours. This pushes the ribs through the stall and tenderizes them without steaming away the bark.
- 5:00–5:45 PM: Unwrap, glaze with bbq sauce, and cook at 225°F (1 hour). This sets the sauce and develops a sticky, caramelized finish.
- 5:45–6:00 PM: Rest ribs, tented in foil or butcher paper.
- 6:00 PM: Slice, glaze again for shine, garnish, and serve hot!
Only Have a Gas Grill? That’s Okay Too!
You can still make juicy, tender baby back ribs on a traditional gas grill. I’ve given detailed instructions in the recipe card below on how you can make these fork-tender baby back ribs on a traditional gas grill.
Just note that spritzing the ribs and wrapping them are essential to prevent them drying out, especially on gas grills with a drier heat.
Serving Suggestions for BBQ Smoked Ribs
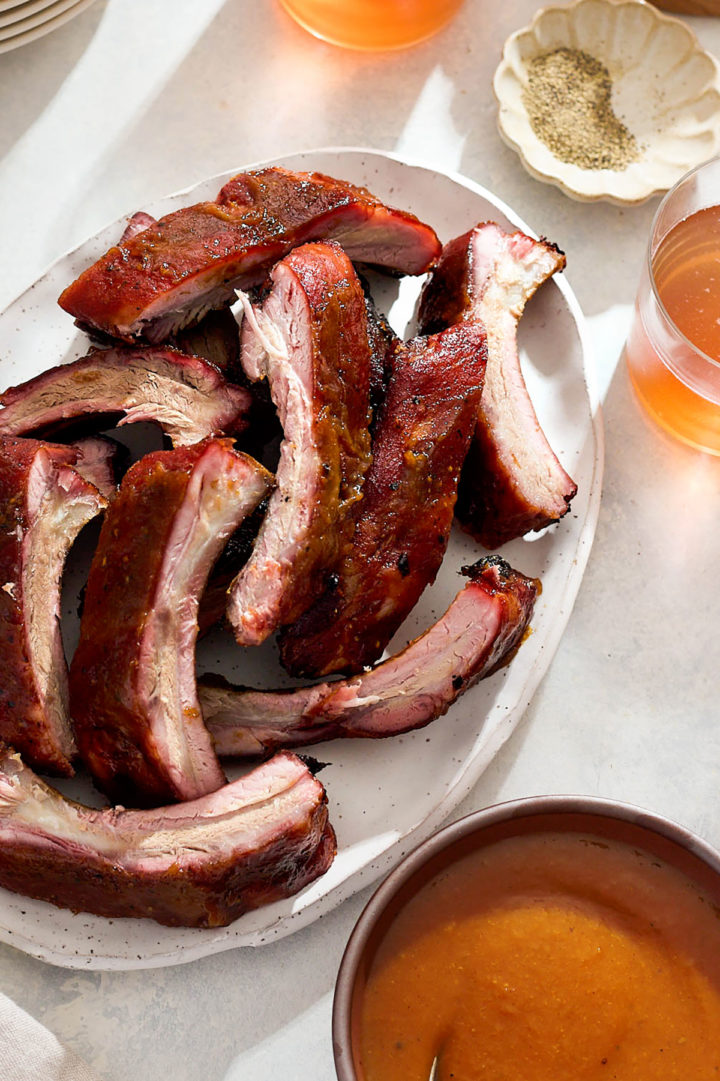
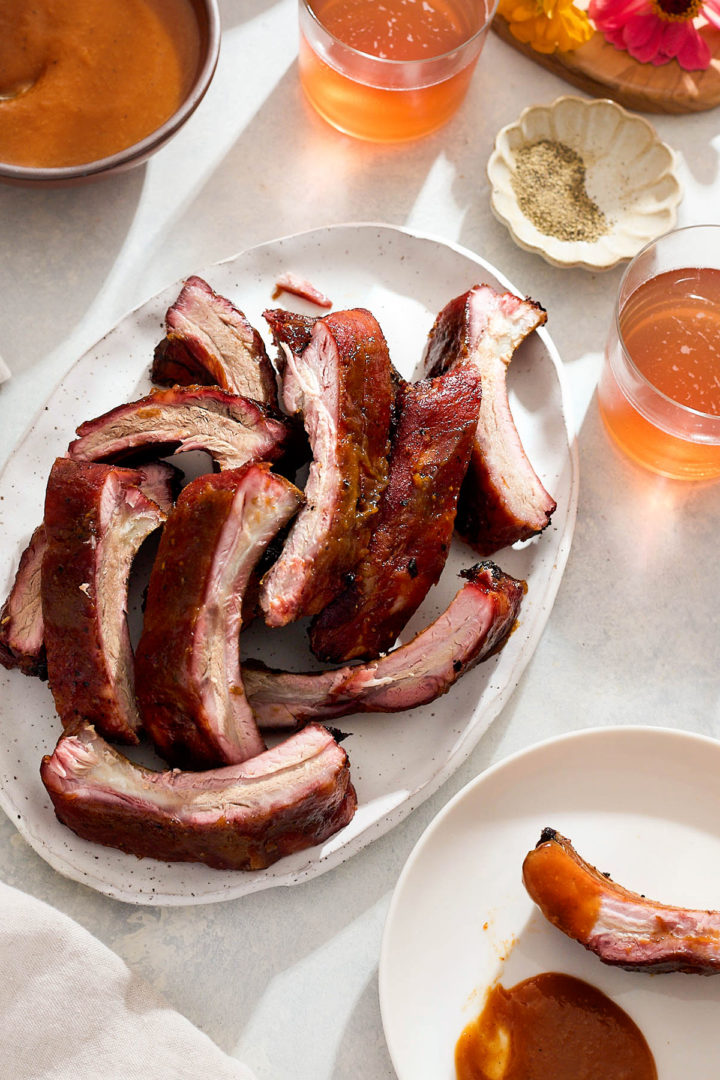
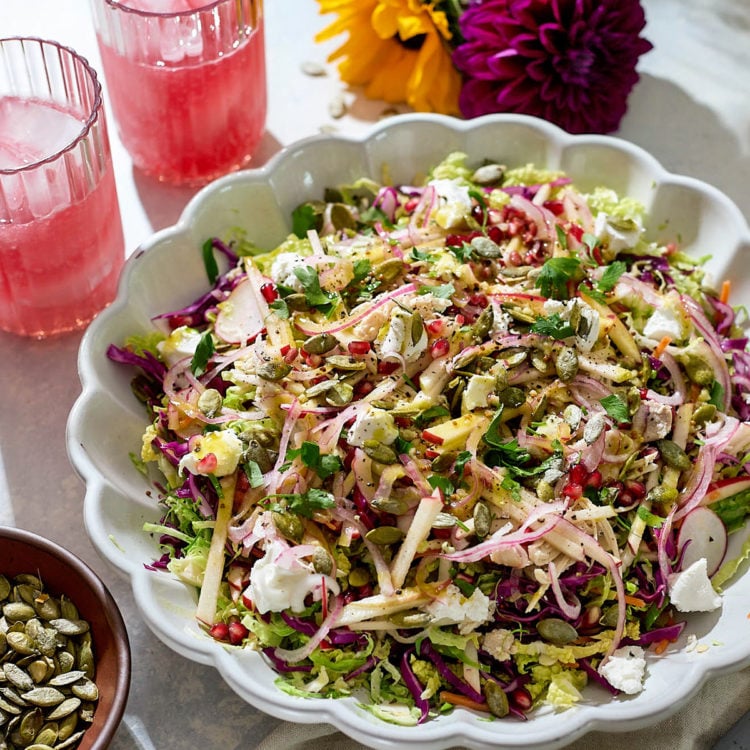
We like to serve these ribs with some of the reserved peach bbq sauce for drizzling or dipping (if you warm up the bbq sauce first, it’s easier to drizzle). Sometimes I’ll garnish the ribs with a few sprigs of parsley or chopped cilantro for a fresh, herbal finish.
As for side dishes, try pairing the ribs with:
More Traeger Recipes to Try
Want to try more ways to cook on your Traeger? These smoky, flavor-packed recipes are perfect for grilling season! You can also browse all of the Traeger recipes through the Recipe Index.

Stay Inspired in the Kitchen!
Want more delicious recipes, kitchen tips, and meal inspiration? Sign up for the Good Life Eats Newsletter and get:
✔ Tried-and-true recipes—from quick weeknight meals to special occasion favorites.
✔ Seasonal meal ideas—helping you make the most of fresh, in-season ingredients.
✔ Time-saving kitchen tips—boosting your confidence and creativity in the kitchen.
Smoked Baby Back Ribs
These smoked baby back ribs are slow-cooked with the 3-2-1 method for tender, smoky perfection. Made on a pellet smoker with a flavorful dry rub and glossy BBQ glaze, they’re a backyard barbecue favorite.
Ingredients
Simple Rib Rub
- 2 tablespoons brown sugar
- 2 teaspoons kosher salt
- 1 teaspoon black pepper
- ½ teaspoon smoked paprika
For the Ribs:
- 2 racks baby back pork ribs (about 6 pounds total), silver skin removed
- Yellow mustard (for slather)
- Rib rub (kosher salt, brown sugar, black pepper blend) – as needed
- Barbecue Sauce (try my Sweet and Tangy Peach BBQ Sauce)
Instructions
Remove the Silver Skin
- Before you season, you’ll want to take off the silver skin — that thin, tough membrane on the bone side of the ribs.
- Lay the ribs bone side up on your cutting board. Slide the tip of a paring knife under the silver skin at one end until you can lift a corner.
- Grab that corner with a paper towel (it gives you grip) and pull steadily — it should come off in one piece. Removing it makes the ribs more tender and lets the seasoning and smoke really sink in.
Mustard Slather & Seasoning
- Brush the ribs lightly on all sides with yellow mustard. This doesn’t add much flavor — it’s just glue to help the rub stick.
- Coat the ribs generously with your dry rub blend, making sure to get the edges too. Don’t be shy — this is where a lot of the flavor comes from.
- Let the ribs rest at room temperature while you preheat the smoker so the rub starts to mingle with the meat.
First 3 hours: Build Smoke & Bark
- Preheat your smoker to 160–180°F. Place ribs bone side down directly on the grates.
- Smoke uncovered for 3 hours to develop that deep smoky flavor and a nice crust (called the “bark”).
- Optional: Spritz the ribs once per hour with apple juice or broth to keep the surface moist and help the smoke stick.
Next 2 hours: Wrap to Tenderize
- Raise the smoker temperature to 225°F.
- Wrap each rack tightly in parchment or butcher paper, meat side down. (Avoid foil if you want a firmer bark — foil makes them softer and more “fall-off-the-bone.”)
- Return the wrapped ribs to the smoker for 2 hours. This stage locks in moisture and tenderizes the meat.
Final 1 hour: Unwrap & Glaze
- Carefully unwrap the ribs and discard any juices.
- Place ribs back on the smoker, bone side down. Brush generously with peach-bourbon BBQ sauce (or sauce of your choice).
- Cook uncovered for 45 minutes, basting with more sauce every 15-20 minutes until the ribs are glossy, sticky, and beautifully caramelized.
- Ribs are ready when they bend easily but don’t fall apart — you want them tender but still sliceable.
Rest & Serve
- Transfer the ribs to a cutting board and loosely tent with foil.
- Let rest for 10-15 minutes so the juices settle back into the meat.
- Slice cleanly between the bones.
- Serve stacked on a platter with a drizzle of warm sauce and garnish with fresh herbs if you’d like.
Gas Grill Adaptation for Smoked Baby Back Ribs
If you don’t have a smoker, you can still make tender, smoky ribs on a gas grill.
First 3 Hours: Smoke / Low Roast Phase
- Set your grill up for indirect heat — burners on one side, ribs on the other.
- Place ribs bone side down on the cooler side. Close the lid to trap heat and smoke.
- Aim for 160–180°F if you can; if your grill won’t go that low, hold it around 225–250°F. Add a foil packet of soaked wood chips (apple, cherry, or hickory) over the lit burners.
- Replace or refresh the packet every hour for steady, light smoke.
- Spritz the ribs with apple juice or broth once per hour to keep the surface moist and help the smoke cling.
Next 2 Hours: Wrap & Tenderize
- Take ribs off the grill and wrap each rack tightly in parchment or butcher paper. (Paper helps preserve bark texture better than foil, which makes them softer.)
- Return wrapped ribs to the cool side of the grill. Hold temperature between 225–250°F.
- Cook for 2 hours — the wrap traps steam, which gently braises the ribs and makes them tender.
Final 1 Hour: Glaze & Finish
- Unwrap ribs carefully and discard the juices. Place ribs back on the cool side of the grill.
- Brush generously with peach BBQ sauce. Close the lid and let them cook for 45 more minutes.
- Re-glaze every 15-20 minutes until the ribs are sticky, caramelized, and glossy.
- Ribs are done when they reach an internal temperature of 200–205°F and bend easily when lifted but don’t fall apart.
- Transfer the ribs to a cutting board and loosely tent with foil.
- Let rest for 10-15 minutes so the juices settle back into the meat.
Notes
Testing to See If the Ribs Done
- Bend Test: Pick up the rib rack with tongs and gently bounce it. Does the surface crack or split slightly? If so, the ribs are perfectly tender.
- Bone Pull: Does it look like the meat has shrunk back from the bones by ¼ to ½ inch? That’s what you want!
- Toothpick Test: Slide a toothpick between the bones. Does it meet with any resistance? If so, keep cooking! Ribs are done when the toothpick slides in effortlessly.
Gas Grill Notes for Success
- Smoke flavor will be lighter than with a pellet smoker, but refreshing the wood chips every hour builds a nice, balanced profile.
- Gas grills fluctuate more than smokers. Place an oven thermometer near the ribs to monitor and adjust burners or vents as needed
- Spritzing and wrapping are especially important on gas grills because their heat runs drier — these steps prevent tough, leathery ribs and keep them juicy.
Recommended Products
As an Amazon Associate and member of other affiliate programs, I earn from qualifying purchases.


Try Making Smoked Baby Back Ribs!
Next time you’re firing up the smoker (or even a gas grill), try these tender, flavorful smoked baby back ribs! The 3-2-1 method makes it easy to get that perfect balance of smoky bark, juicy meat, and sticky BBQ glaze. They’re a backyard favorite that never disappoints.
Did You Try This Recipe? I’d love to hear how it turned out! Leave a comment and a review below—your feedback helps others and makes my day.
Share Your Creations!
If you took a photo, tag me on Instagram @goodlifeeats and use #goodlifeeatsrecipes—I’d love to see what you’re cooking up in your kitchen!

Laura says
Everything on the plate looks absolutely delicious!
Zoe says
you both did a great job! Those ribs looks mouth-watering good!
Kristen says
Love it, you two! What a great idea. Katie – that photo of all of them together is so cool. Very neat perspective!