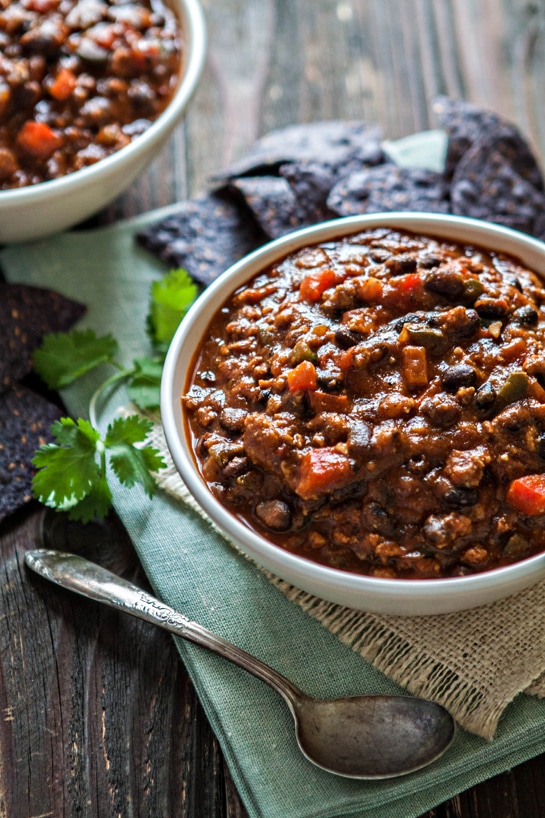
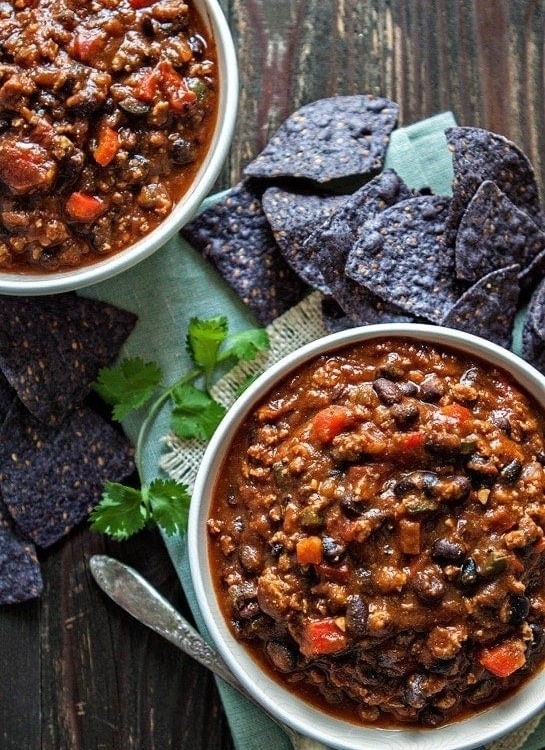
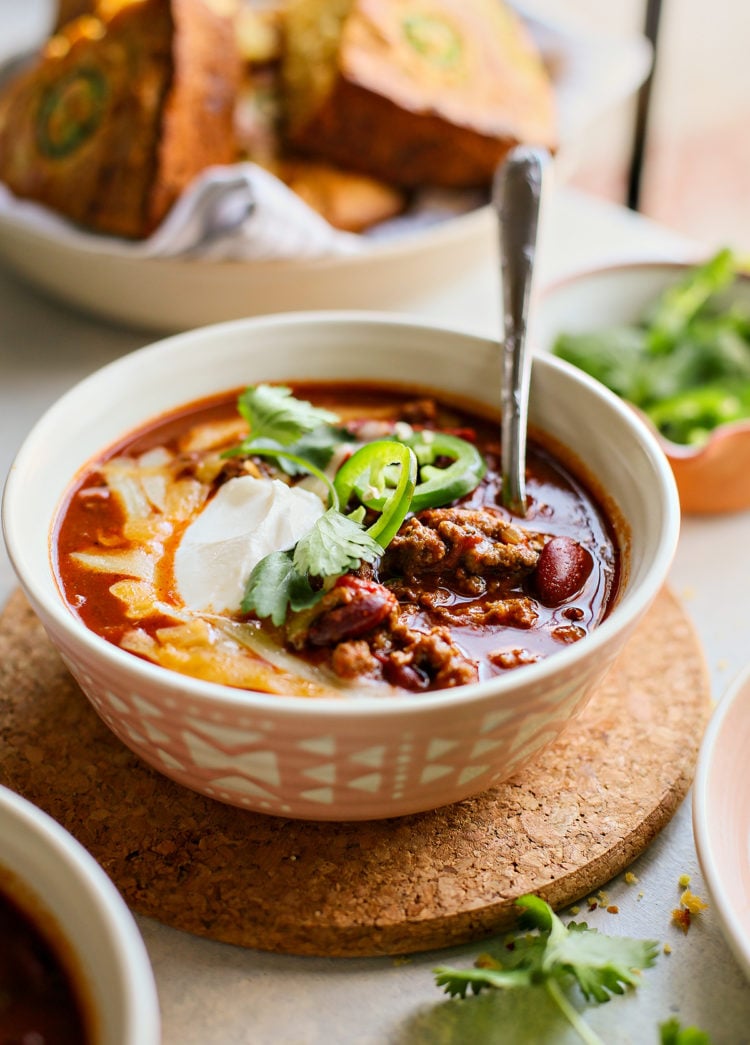
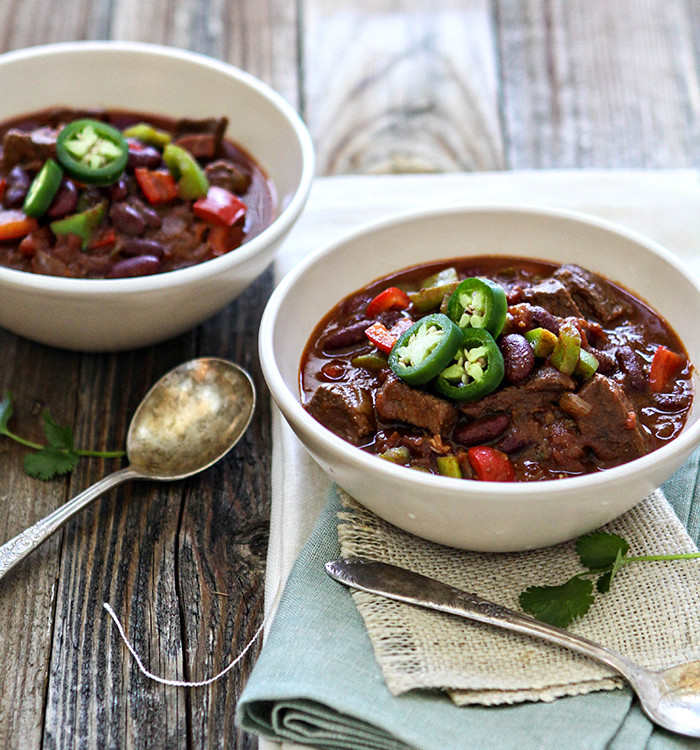
Brisket Chili
Brisket Chili is simmered low and slow to infuse the soup with layers of flavor that everyone loves! It’s a smoky, slightly spicy chili that will warm you from the inside out on cold days. If you have leftover brisket to use up, make this chili recipe!
This post may include affiliate links. As an Amazon Associate and member of other affiliate programs, I earn a small commission from qualifying purchases.
Adding Brisket to Your Chili Infuses It With So Much Smoky Flavor!
Brisket is an unexpected addition to chili that my family went nuts for! Because the meat was smoked first, it was already ultra tender. Letting the brisket further simmer in the chili tenderized it even more, and that gorgeous smoked flavor infused into the pot of chili.
Here’s why I think you’ll love this brisket chili recipe:
✔ Rich and Smoky Flavor: Smoked brisket adds a depth of flavor you just can’t get from regular ground beef, no matter what spice blend you use.
✔ Insanely Tender Texture: Smoking and then simmering the brisket makes it fall-apart tender and gives the chili a restaurant-quality texture that will have your friends and family begging you to make this recipe again.
✔ Flexible Ingredients: If you don’t have any leftover brisket to use in your chili, don’t fret! You can also order from your favorite local restaurant to get smoked brisket (just make sure there’s no bbq sauce on it!)
Enjoy!
-Katie
Ingredients You’ll Need
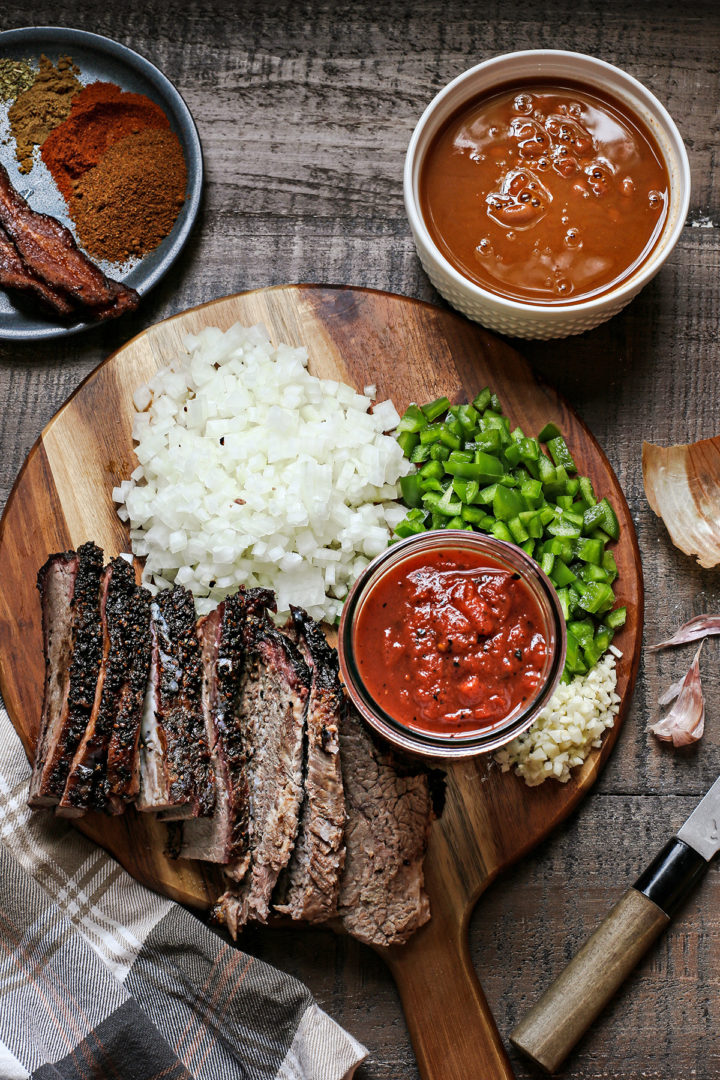
The leftover brisket is the star ingredient in this chili recipe, so I kept the rest of the ingredients super simple. A full list of ingredients with their measurements can be found in the recipe card below, but here’s an overview of what you’ll need.
- Veggies and Aromatics —The flavor of the chili is developed with yellow onion, garlic, and bell pepper. In my recipe testing, I much preferred the earthy, sharp flavor of green bell pepper rather than the sweeter flavor of red bell pepper. Brisket is very meaty and rich in flavor, so you need the bell pepper to hold its own and not disappear into the background.
- Canned Fire Roasted Tomatoes — You could swap in regular canned tomatoes in a pinch, but the fire roasted variety adds lots of smoky flavor that goes perfectly with the tender brisket.
- Chicken Stock — Nope, we’re not using beef broth! In my recipe testing, I found that doubling up on the beef flavor (brisket + beef stock) made the chili taste way too beefy. Trust me, your brisket chili will taste plenty beefy with all that brisket!
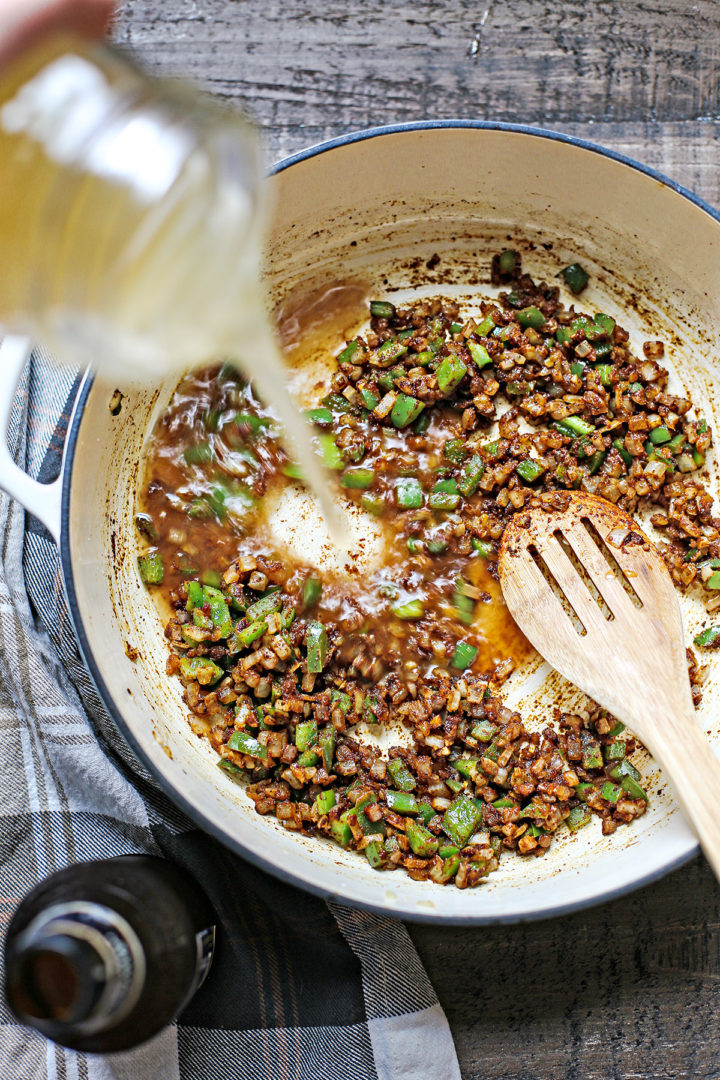
- Amber Beer — Adding beer to chili deepens the flavor and adds more nuance.
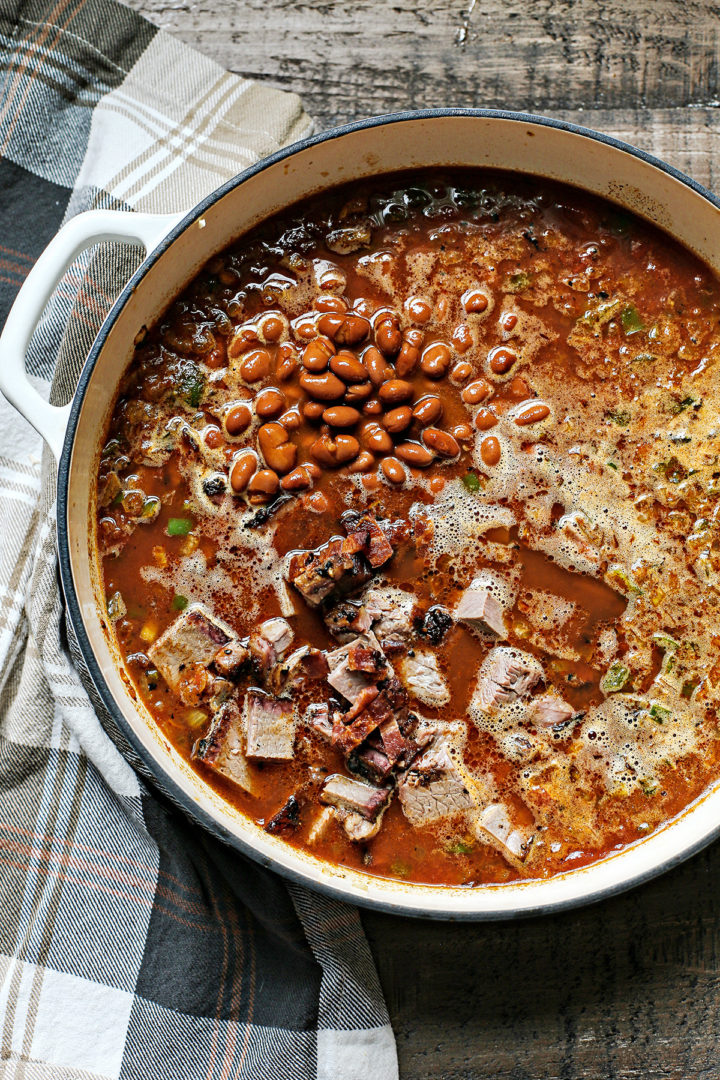
- Leftover Smoked Brisket — You MUST use smoked brisket (leftover or from a restaurant). Brisket is a tough cut of meat that needs to be pre-cooked and tenderized before being added to the chili.
- Bacon — This recipe calls for chopped, cooked bacon. To make this, I recommend following my bacon bits recipe.
- Canned Chili Beans — Don’t drain the beans! The sauce is spicy and packed with flavor that rounds out the chili.
- Spices —For this recipe, I used a blend of freshly ground black pepper, sea salt, regular paprika, ground cumin, ancho chili powder, dried thyme, and dried oregano. I prefer making my own chili seasoning to ensure the flavor of my brisket chili is consistent batch after batch. Store-bought chili powder can also taste fairly one-note or just plain spicy, and if I’m adding expensive brisket to my chili it had better taste perfect!
How to Make Chili with Brisket
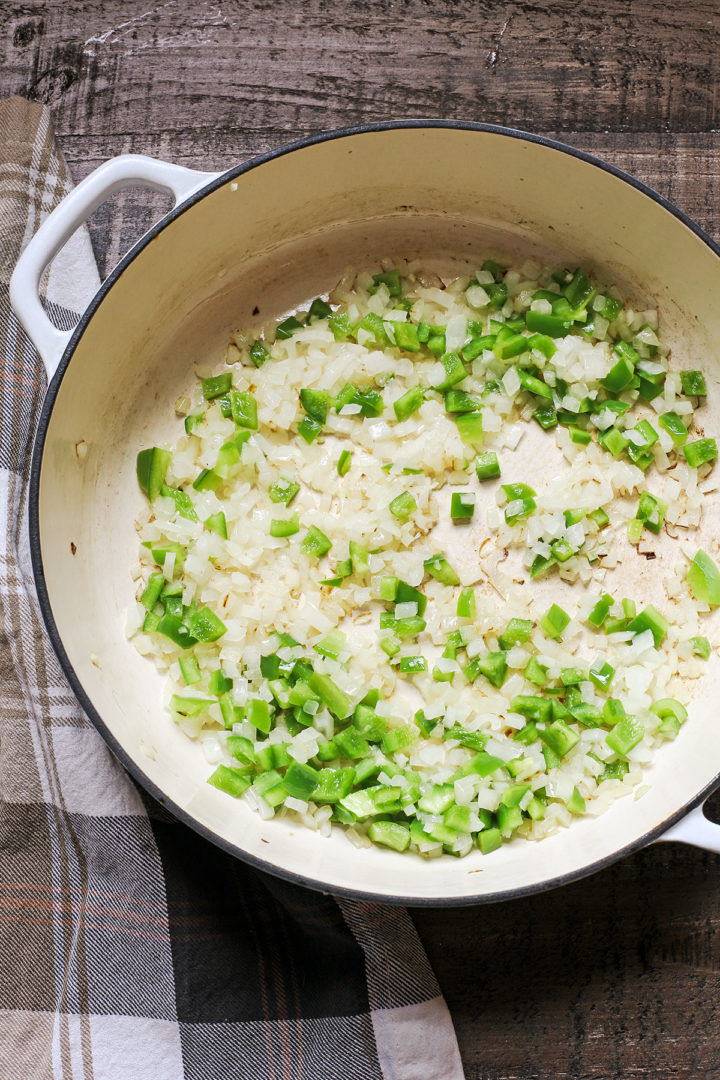
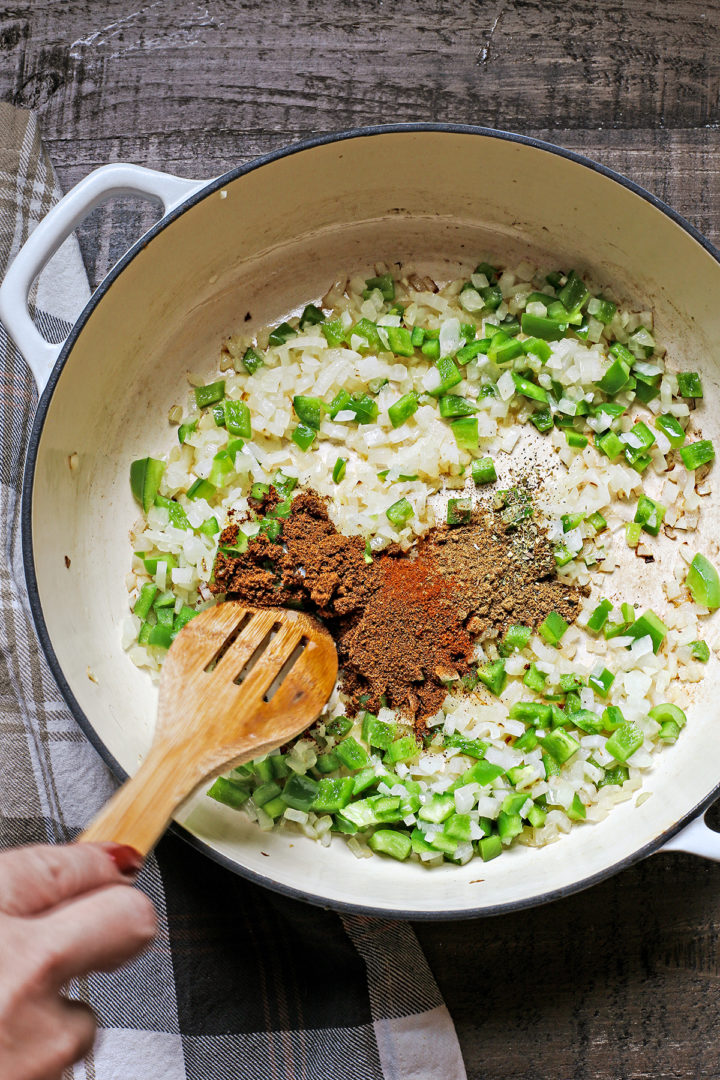
- Sauté the aromatics. Add the chopped onion to an oiled cast iron pot over medium heat and cook just until translucent. Then, add the garlic and bell peppers.
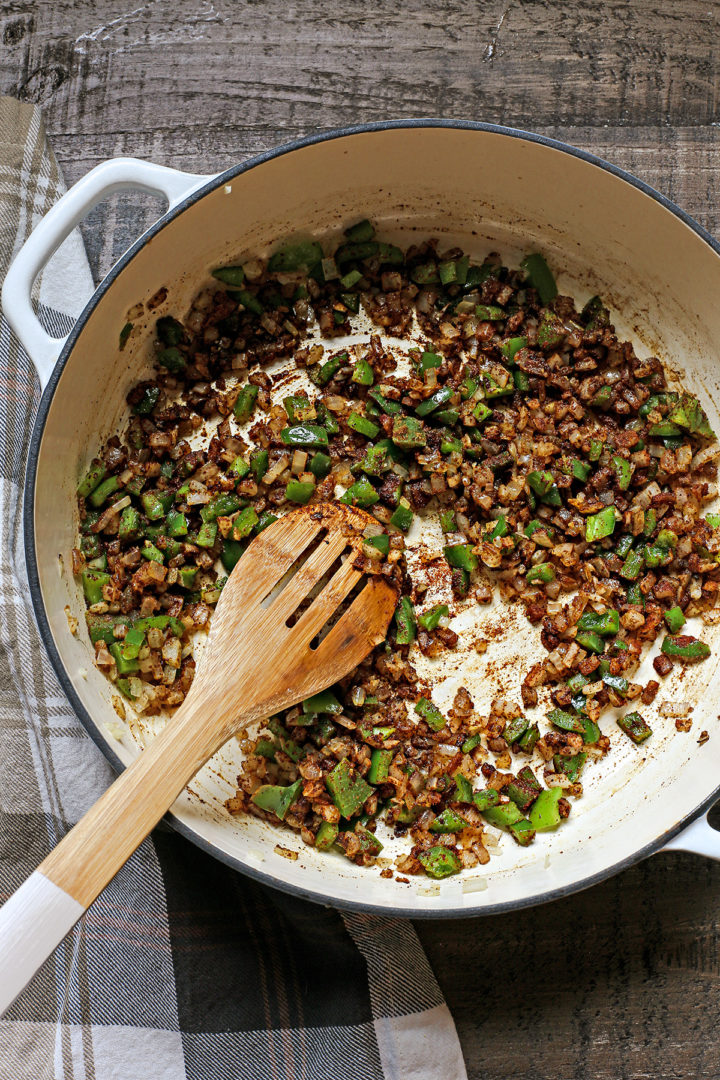
- Toast the spices with the aromatics. Toasting the spices briefly adds wakes them up and makes for a more flavorful chili.
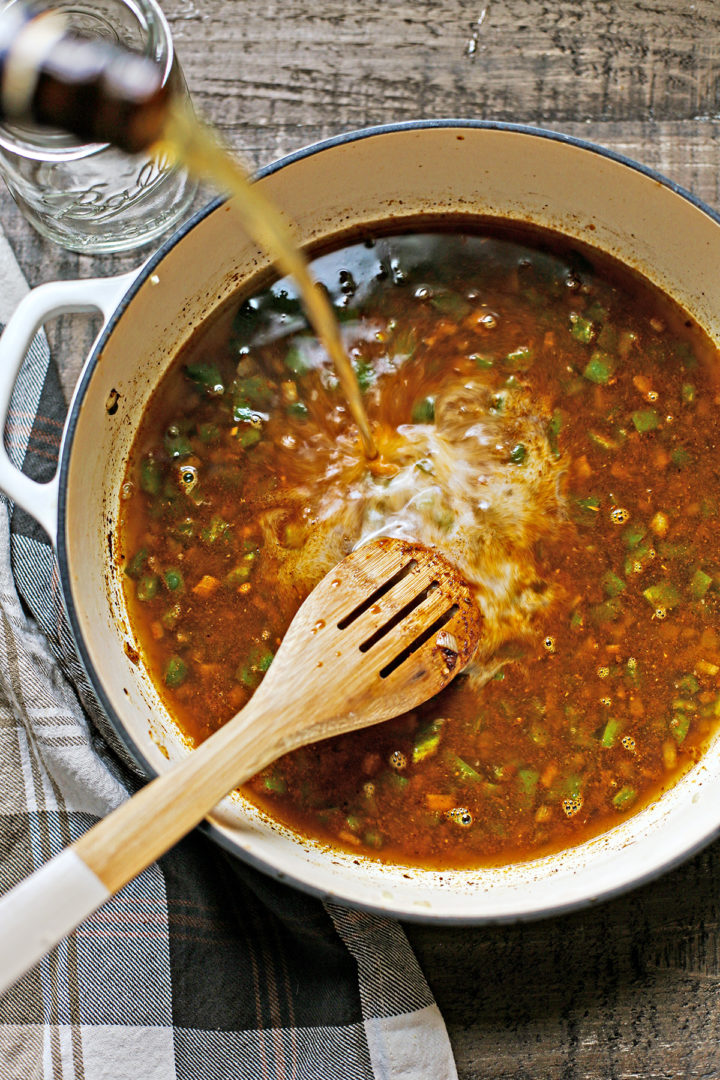
- Add the liquids to the pot, followed by the meat and beans. Take the time to scrape the bottom of the pot to release any golden bits stuck to the bottom. Those golden bits are called fond, and they’re pure flavor!
- Simmer for 3+ hours before serving. Don’t shortchange the simmering time. This creates the richest, thickest, most flavorful chili. It won’t taste as good if you just let it simmer for 30 minutes instead of 3+ hours! Stir the chili as it simmers to prevent it from sticking to the bottom and burning. (Every 25 to 30 minutes would be fine.)
The above is simply a quick summary of this recipe. Check out the full recipe in the free printable recipe card at the bottom of this post for all the detailed instructions.
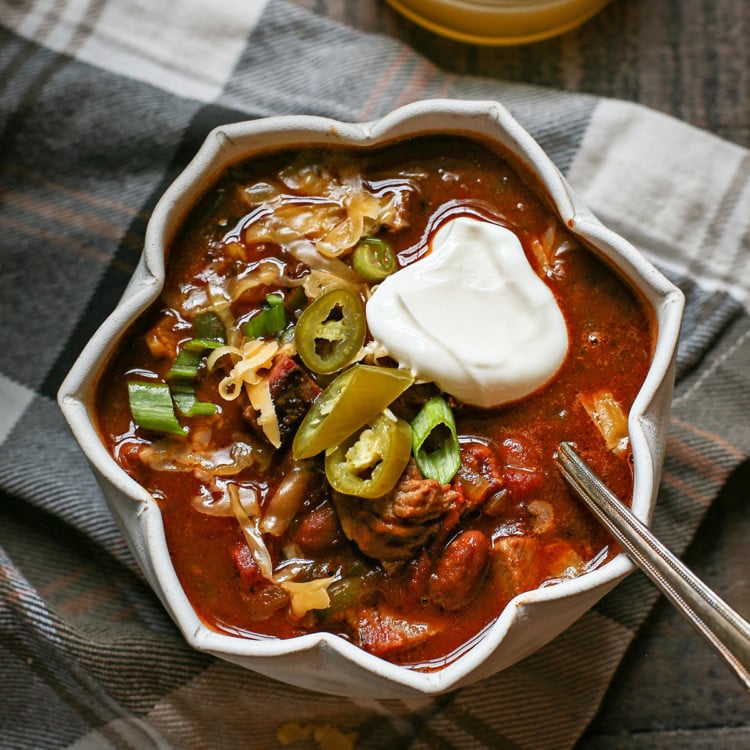
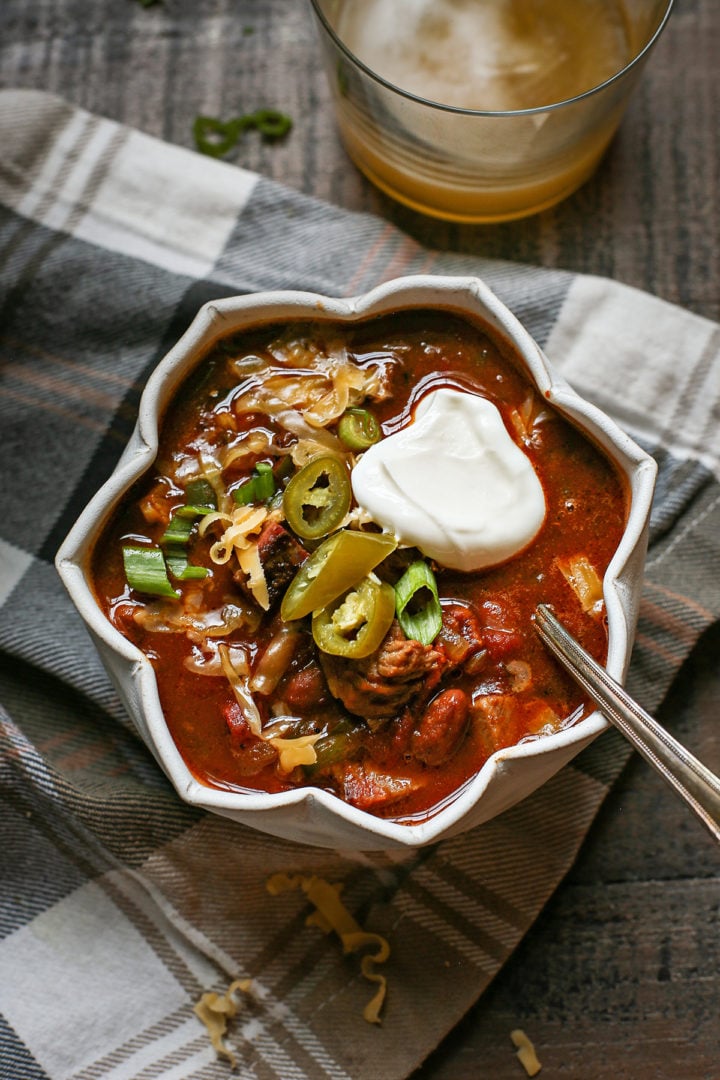
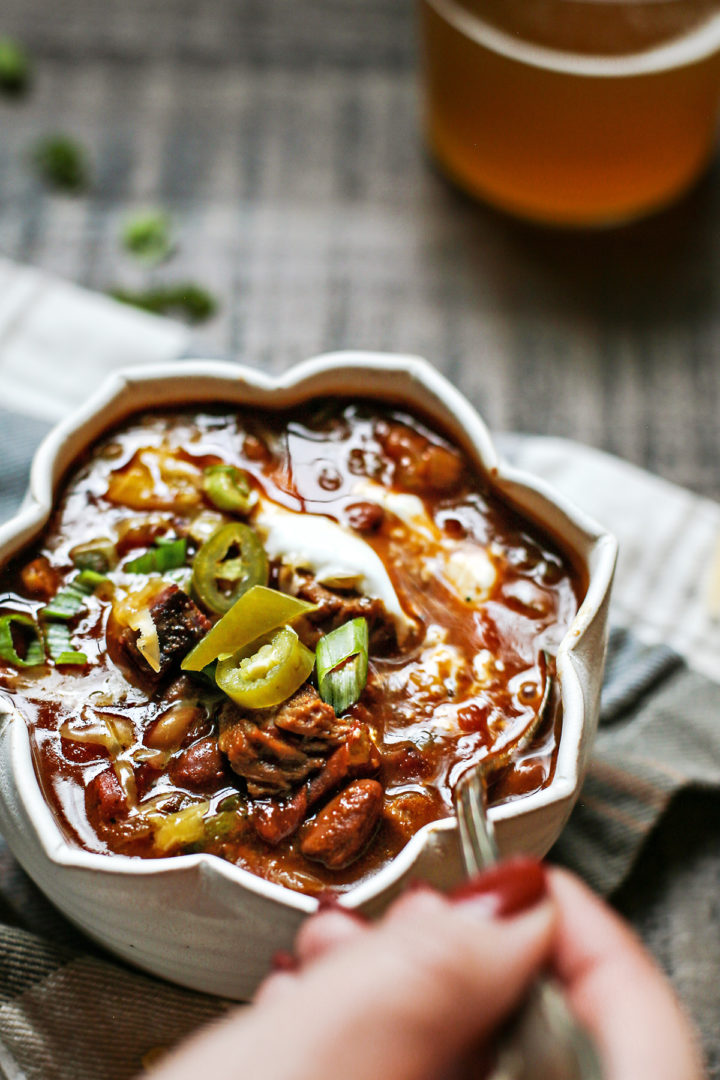
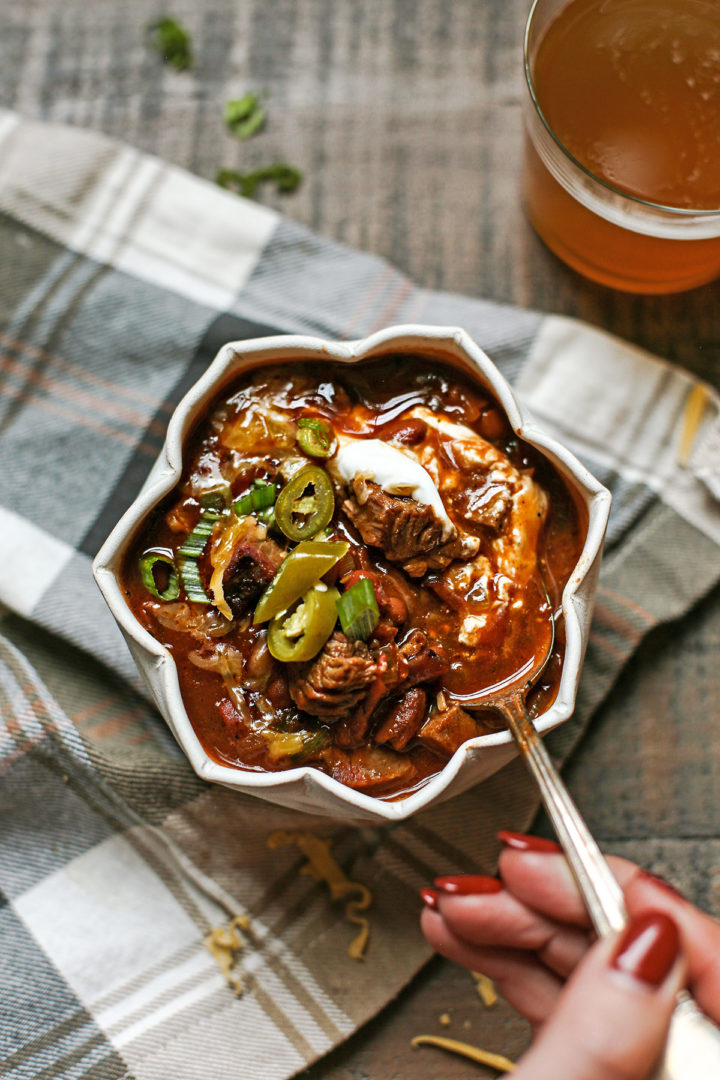
Topping Ideas
Load up your bowl of chili with as many toppings as you like! Some chili toppings that we adore are:
- Sour cream
- Shredded cheddar cheese
- Chopped green onions or chives
- Homemade bacon bits
- Chopped green chiles

Recipe FAQs
Got questions about how to make this recipe? Here are the answers to a few commonly asked questions. Feel free to leave any other questions in the comments on this post and I’ll respond with answers.
Can I make this recipe in a slow cooker?
Yes, I imagine you could pop this into a slow cooker in the morning and slow cook on low all day if you don’t have time to let it simmer for 3 hours on the stove.
Can I add the brisket to the chili without smoking it first?
Nope, brisket can be a tough cut of meat and smoking it tenderizes it in addition to giving it lots of flavor.
And if you don’t have a smoker, you can always look for a restaurant that carries smoked brisket and use that. Just make sure to order your brisket without any bbq sauce on it.
What can I substitute for the brisket?
If you don’t have access to smoked brisket, I would substitute ground beef. Just know that the chili won’t taste nearly as smoky and beefy.
Do I have to add the beer?
Nope! You don’t have to add the beer. You can swap it out for non-alcoholic beer or even chicken broth if you prefer.
How long should you cook chili for?
The chili with brisket needs to be cooked for at least 3 hours at a simmer. Bring the chili to a boil, then reduce the heat (do not boil for 3 hours!).
I’ve simmered this chili for up to 6 hours without issue. You just have to periodically stir the chili and scrape the bottom of the pot with a wooden spoon to make sure nothing sticks and burns
Katie’s Tip: I simmer my chili with the lid off to help it thicken up. Your house will smell amazing!
Sides to Serve with Brisket Chili
Unsure what goes well with chili? Pair this smoked brisket chili with one or more of the following sides:
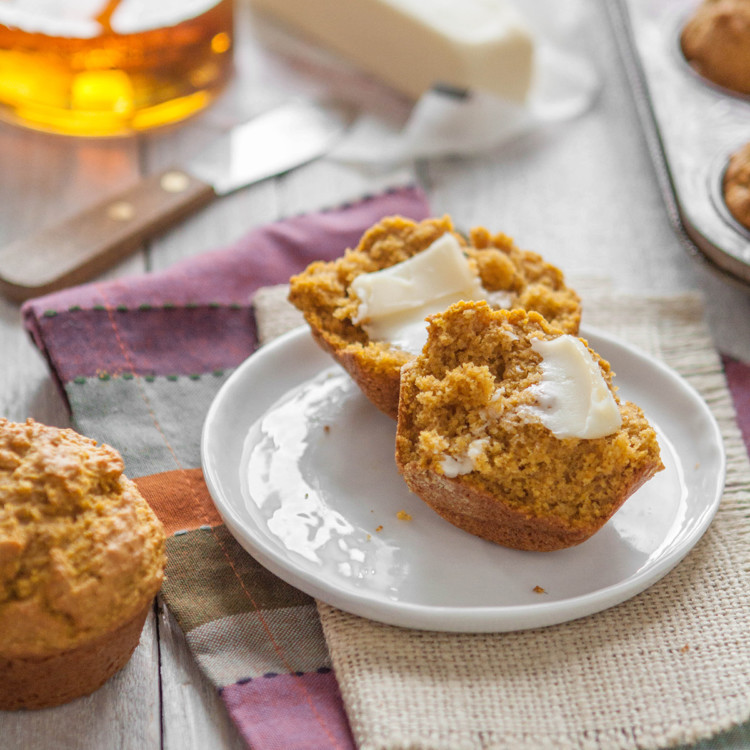
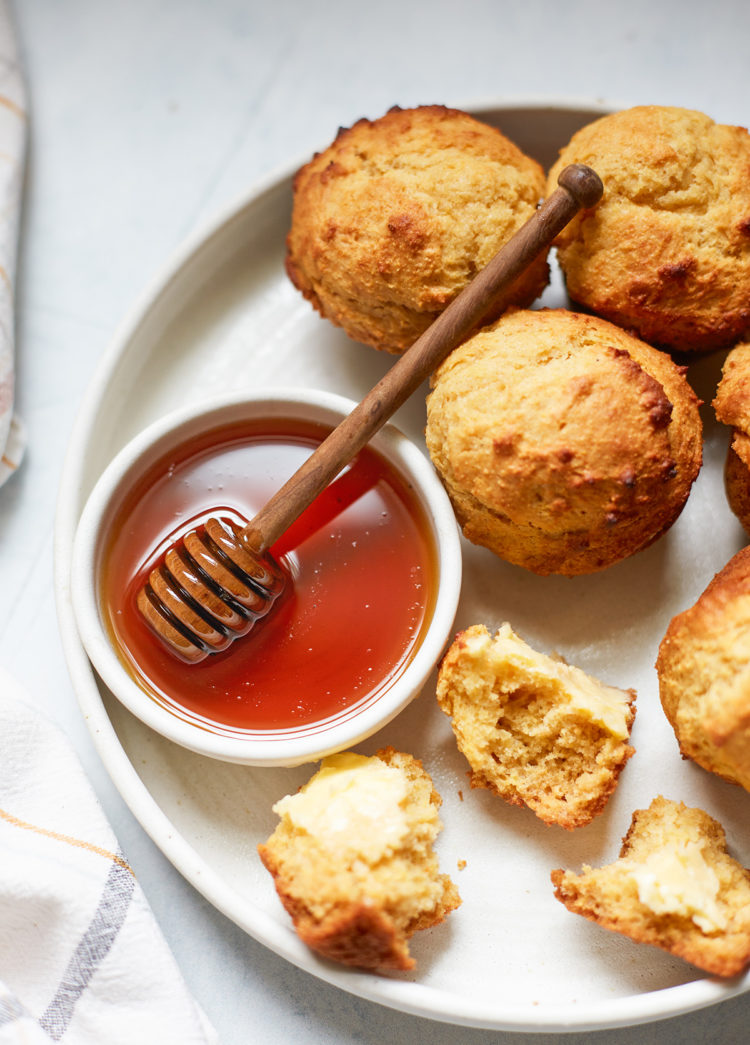
- Pumpkin cornbread muffins, jalapeño cornbread, or honey cornbread muffins
- Chile cheese cornbread scones
- Baked potatoes (to make an epic loaded baked potato!)
- Roasted broccoli
- Beer bread muffins
- Apple bacon grilled cheese sandwiches
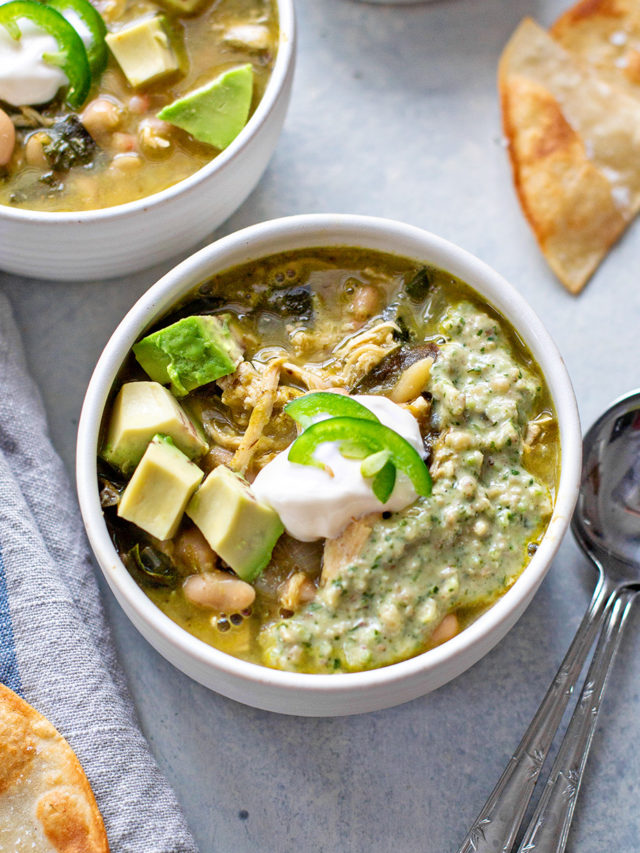
More Easy Chili Recipes to Try

Stay Inspired in the Kitchen!
Want more delicious recipes, kitchen tips, and meal inspiration? Sign up for the Good Life Eats Newsletter and get:
✔ Tried-and-true recipes—from quick weeknight meals to special occasion favorites.
✔ Seasonal meal ideas—helping you make the most of fresh, in-season ingredients.
✔ Time-saving kitchen tips—boosting your confidence and creativity in the kitchen.

Brisket Chili Recipe
Brisket chili is simmered low and slow to infuse the soup with layers of flavor that everyone loves! It’s a smoky, slightly spicy chili that will warm you from the inside out on cold days. If you have leftover brisket to use up, make this chili recipe!
Ingredients
- 2 medium sized Yellow Onions
- 2 Green Bell Peppers, chopped
- 1 tablespoon minced Fresh Garlic
- 1 - 14 ounce can Fire Roasted Tomatoes
- 3 cups Chicken Stock
- 1 bottle Amber Beer
- 2 ½ pounds Smoked Brisket, cubed
- 6 strips of Bacon, cooked
- 3 cans Chili Beans in Mild Sauce
Spices
- 1 tablespoon Paprika
- 1 tablespoon Ground Cumin
- 2 - 3 tablespoons Ancho Chili Powder
- ½ teaspoon Dried Thyme
- ¼ teaspoon Dried Oregano
- Black Pepper, to taste
- Sea Salt, to taste
Instructions
- Heat a large cast iron pot over medium heat. Add a small amount of oil (or reserved bacon fat). Add the onion and saute until it is translucent.
- Then, add the garlic and green bell peppers, stirring to combine. Saute for 2 - 3 minutes, or until the garlic is fragrant.
- Next, add the paprika, ground cumin, ancho chili powder, thyme, and oregano. Stir until the seasonings coat the vegetable mixture and saute until fragrant, 2 - 3 minutes.
- After that, add the fire roasted tomatoes, scraping up any browned bits on the bottom of the pan.
- Stir in the chicken stock and beer, continuing to scrape any remaining browned bits from the bottom of the pan.
- Add the cubed smoked brisket, cooked bacon, and the chili beans. Stir until combined.
- Bring to a boil over medium heat. Then, reduce heat to low and simmer for at least 3 - 4 hours, stirring periodically so the chili doesn’t burn on the bottom of the pot.
- Season to taste with salt and pepper.
- Ladle chili into individual serving bowls and serve topped with your choice of toppings.
Notes
Note: I have simmered up to 6 hours before with no issues. Just make sure you stir periodically so the chili doesn't burn.
To freeze: I like to ladle the chili into smaller containers or jars so I can reheat individual portions for lunch. You can reheat the chili from frozen in the microwave or on the stovetop. If stored correctly, frozen chili will last for up to 3 months.
Recommended Products
As an Amazon Associate and member of other affiliate programs, I earn from qualifying purchases.


Nutrition Information:
Yield: 8 Serving Size: 1Amount Per Serving: Calories: 598Total Fat: 32gSaturated Fat: 12gTrans Fat: 0gUnsaturated Fat: 16gCholesterol: 162mgSodium: 980mgCarbohydrates: 23gFiber: 5gSugar: 8gProtein: 51g
GoodLifeEats.com offers recipe nutritional information as a courtesy. This provided information is an estimate only. This information comes from online calculators. Although GoodLifeEats.com makes every effort to provide accurate information, these figures are only estimates.
Try Making Your Chili with Brisket!
Did You Try This Recipe? I’d love to hear how it turned out! Leave a comment and a review below—your feedback helps others and makes my day.
Share Your Creations!
If you took a photo, tag me on Instagram @goodlifeeats and use #goodlifeeatsrecipes—I’d love to see what you’re cooking up in your kitchen!


Leave a Comment